Last updated: Exalt Version 2.0.3.0 (Sep 2021) |
|---|


The Mad Lab drops the full Mad Scientist Sorcerer Set, a decent set of UT items. The Conducting Wand is a good DPS swapout wand for mid-game, although other wands can outclass it in that regard. The Scepter of Fulmination is a support scepter, having the unique ability to give  Slowed to enemies hit by it. The Robe of the Mad Scientist is a very unique utility based robe, giving some mediocre stats but a proc that reduces your ability’s MP cost by 25%. It can even see use in endgame sets, especially if paired with The Twilight Gemstone, another MP reducing item. Finally, the Experimental Ring is a good balanced ring for midgame, rivaled by the Ring of the Nile. The former two both give the same amount of HP and MP, with the difference being that the Experimental Ring gives more defensive stats, while the Ring of the Nile gives more offensive stats. However, there are a few rings later on that give both or better stats.


This dungeon also drops half of the Horrific Sorcerer Set, a more defensive and mobility focused set for the Sorcerer. Specifically, the Grotesque Scepter dropping from the secret boss, which gives high damage outputs, and the Horrific Claws, a balanced ring similar to the Experimental Ring.


This dungeon is a great source of Potions of Wisdom akin to the Undead Lair. However, the Mad Lab also drops a guaranteed Potion of Defense from the secret boss, possibly combining both the Undead Lair and Toxic Sewers into one source. Although the Mad Lab is harder to rush, it can still be considered a good alternative to the aforementioned dungeons.


The Flying Brains (from the Rocky Mountain or Snow Field) drop Mad Lab portals at a low drop rate. They aren’t particularly hard enemies, as they have low DEF and their attacks are easy to predict. The Lucky Flying Brain meanwhile is a rarer and slightly harder version of the Flying Brain, with more difficult attacks to dodge. However, the Lucky Flying Brain does drop the Mad Lab as a guaranteed portal.
 You can also buy the Lab Key from the Nexus for 100
  .
.
Example Layout:

Navigating through this dungeon is rather simple. Watch out for the  Confused bots, don’t stand next to the big enforcer bots, don’t shoot at the mini-Horrific Creations until all the green abominations are dead (unless you are a maxed character that is capable of dealing damage past the healing), and be wary of the exploding bots. Try to clear every single room of the Tesla coils before you go to fight the boss - when all of them are destroyed, you are allowed to fight the Horrific Creation, which drops Potions of Defense, as well as the Conducting Wand and Experimental Ring.
When you clear a room also shoot every single white box -  , these are the Tesla Coils.
If you destroy every single one in the dungeon you will open the secret room where the second boss is. Once you have done all that you are ready to fight the Boss(es). There are two other things you should know. Firstly, that the green Lab Vats turn you into an animal which makes it so that you get  Stunned, but it also grants you
  Speedy (while an animal you can still use abilities, making this state good for an unmaxed priest who just wants to help out); the blue Lab Vats revert you to human form. Secondly, in every Mad Lab there is an acid room that contains a random design chosen from an existing pool of layouts. You have to dodge
  Confused shots and get through the room with out falling into the Liquid Evil, which is just slightly weaker Lava. This room must be passed in order to reach the boss. This characteristic can be used to a navigational advantage if one simply wants to finish the dungeon, since these rooms only appear on the main path to the boss’s room.

These are probably the most intimidating monster in the dungeon. These creatures, along with having twice the health of a Medusa, can deal increasing damage as you attempt to destroy them. As they are damaged they increase in size, which proportionately increases the size the bullets are and damage the bullets deal. The easiest way to pass by them is to avoid dealing damage to them, as their initial damage output is very low, especially to a melee class with a decent level of defense.

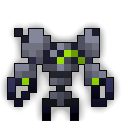
These are dangerous due to their massive damage output, combined with the Mini Bots they spawn when they die. These guys shoot two different shotguns, a long range one dealing 150 per shot, and a short range one dealing 60 per shot. When they die they spawn 1-4 Mini Bots to fight, these Mini Bots just might confuse you right into another vengeful Enforcer Bot.

These enemies aren’t that dangerous on their own, as they don’t do much damage and don’t move a lot. However, the real threat is that they heal nearby Crusher Abominations, making them much more of a priority to defeat if a Crusher Abomination is nearby.

These little jerks are everywhere and seem to know when you are focused on a big enemy, because that is when they strike. Alone these monsters aren’t bad, but when you are fighting something that can insta-kill you in a 3 short hits, it is suggested you be on the look out for pink, as their shots will give  Confused to you for a short duration, causing momentary disorientation.

These enemies must be taken care of as soon as possible. Their initial attacks aren’t that deadly. However, the real danger is that they explode after taking enough damage. If they start flashing, either destroy them as soon as possible or run away as far as you can. Sitting on them during their explosion almost guarantees an instant death.

Fighting Dr. Terrible is pretty straightforward - just shoot at him when he’s vulnerable and shoot his minions as they appear (it probably won’t get to this phase with sufficient DPS) if you feel you need to (especially if he spawns those mini bots). During Terrible’s vulnerable phase, three of the four coils in the room will spawn gaseous shots that do 200 damage each. If you stay in between, as close to the center, of these coils, you’ll be out of range of these gas shots. Terrible himself doesn’t have a direct shot attack, so your only real concern is to avoid the two types of “grenades” he throws (a bomb which explodes into gas after about a second and a shot tower). Both of these can be disposed of without being a real threat if you have good DPS. Knights can actually take advantage of the fact that Dr. Terrible himself doesn’t fire shots, as they can easily run up and stun him, preventing him from throwing any more towers or grenades. After a while he will retreat into a “bubble” in the center of the room where he is safe from harm. During this phase, he will spawn minions (excluding the Crusher and Enforcer) from four cages on the left/right most edges of the room. After a while, he leaves his safety bubble, vulnerable to attack, and his attack cycle repeats from there.

This boss is one of the most powerful, most damaging bosses ever (in sheer numbers anyways), and it is almost absolutely invincible. The only way to get it to be vulnerable is to get it to walk into the green Lab Vats. Your means of doing that is to play bait and trick the beast into the acid. It is best if the baiting player is the closest to the Creation, as it leaps toward the closest player. Fast or healing classes are best as bait, as they can quickly dodge the Creation’s attack as they land or heal if they get hit too many times, respectively. When entering the Horrific Creation’s little kennel, everyone who is not bait should immediately go into the corners on the left. While the bait is going to work, be ready at whatever Lab Vat the bait is working on, ready to heal, boost, or otherwise fire at the boss. If you are the bait, it helps to enter the green Lab Vat for the speed boost. Stay in the middle of the acid but move around to both lure the boss in and avoid that lovely Slowing shotgun it does when it lands. The only downside to this strategy would be the fact that you won’t be able to attack right away, but this is probably the easiest way to lure the boss into the acid. As soon as it touches the green Lab Vat, run to the blue Lab Vat (if necessary) and do your damage. When the Horrific Creation gets to half of its health, it will not immediately go into the chase phase after curing itself. It will now start to shoot at people once before it goes to chase. If it doesn’t see anyone it can land on after it shoots at people then it will go back to shooting them again, and there are 15 shots total every time it does that. As the bait, you will have time to circle it a couple of times or otherwise lure its shots and then go back into the acid to lure it in there.
The Mad Lab is a relatively easy midgame dungeon that proves as a good source of both Potions of Wisdom and Defense, although the secret boss is fairly difficult and some enemies can deal high amounts of raw damage.