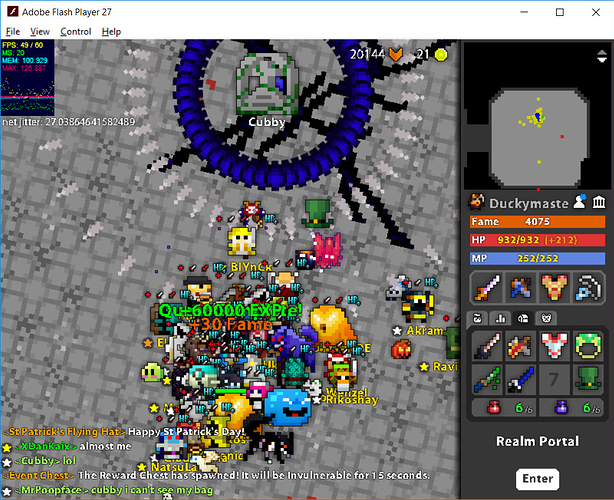
Hi, I’m Duckymaste and this guide will give you tips and tricks on how to survive. This is the first draft and my first ever guide I have written! I have been playing this game for over 6 years and have done both versions of lost halls. I participated in 103 SBC lost halls during the Lost Halls event without losing a single main character. (Also had a couple done in LHZ, Pub Halls, and Lost Boys.)
https://www.realmeye.com/player/DuckymasteLost Halls Discords:
Lost Hallz( LHZ): https://discord.gg/Cys4wJW
Lost Halls( Pub Halls): https://discord.gg/Ntzh472
Lost Boys: https://discord.gg/RqtXE6X
Principles to keep in mind:
-
Your character is more than likely worth more than the loot you are going for. When times get dangerous try to find an escape, but in cases when there are none just Nexus.
-
You have nothing to prove. Do not do unnecessary things which can lead to your death or the death of others. Ex: Do not drag. Do not try to stand on MBC’s(Marble Colossus) death with Oreo. ( Seal of Blasphemous Prayer)
-
The minimap is the most useful tool you have. USE IT. The map will help you spot things you cannot see.
-
Only do things you can do on your own. You will be safer this way and will have no one to blame but yourself.
-
Do not be stingy and conserve hp potions. Use them if you have to, they are easily obtainable and are essential to your survival. I have seen many people rather get gunned down rather than use hp potions.
Lost Halls Survival:
This is arguably one of the hardest parts of the run if you are in a run with crashers. Always assume there is a crasher so you are playing more careful.
-
Always be wary of the spawn room because that is where crashers can drag on the group and ruin the run. There will never be a crusade waiting for you after you break the pillar in the spawn room.
-
Watch out for splits! In my opinion splits are one of the most dangerous things on the way to MBC or Titan. Every time there is a split I suggest zooming out a little and check the map more often than normal. When zoomed out, look for any stragglers that can be potential draggers. If you suspect someone dragging run towards the person so you can see the drag before it becomes a huge issue. The reason for running towards the dragger is to find a safe spot to wait out the storm and call for whatever is being dragged behind the group. Doing this will solidify your chance of survival since you will not be pincered by 2 mobs.
-
During the run, you may encounter a Spectral Sentry. (More commonly known as Spooky Boi) Spooky Boi can be trapped around corners or distracted by decoys. When it is trapped try not to move around because Spooky Boi may get unstuck and chase the group. Spooky Boi vanishes every 15 seconds before teleporting to the nearest player. Spooky Boi cannot attack while vanishing or reappearing so you have time to react to him teleporting on you.
-
Marble Defender is the mini-boss that guards MBC. In some runs Marble defender may already be activated by a rusher. This means you should not just run guns blazing into the room because running through the shots will kill you very quickly. I strongly suggest making a very quick pause before entering the room and assessing a safe path to get to the defender. This is a very simple boss which can be tanked with a decent group.
MBC: https://www.realmeye.com/wiki/marble-colossus
MBC is the main boss of the Lost Halls. MBC is a medium difficulty boss but it has the potential to instakill 8/8 characters.
What to watch out for:
Marble Colossus Rocks (Pop Rocks):
Can instakill 8/8 characters if stood on.
Spiral Tentacles:
Will deal a ton of damage if you get paralyzed or try to run through them.
Pillar Spawns:
Will instakill you if it spawns on you, but can also be stunned. Pillar spawn areas are marked by colored dots on the floor. There are 4 near each corner of the boss room.
Paralyze and Confuse Shots( Will be specified when going through the phases)
( Refer to the wiki for more info on phases) https://www.realmeye.com/wiki/marble-colossus
Phase 4:
Taunt: Your fervent attacks are no match for my strength! BEGONE!”
MBC fires 6 tentacles which do a lot of damage so avoid these at all costs. In between the tentacles MBC also fires yellow pasta like shots which paralyze you for .6 seconds. Avoid these to avoid getting hit by the tentacles.
![]()
Phase 5:
Taunt: “INSOLENTIA! Darkness will consume you!”
While you can circle with him during this phase, I recommend not doing circling if you are new or unconfident. If you decide to circle during this phase the main thing you have to watch out for is the purple boomerangs. ( Confuse for 2.5 seconds and pierces through players)

Switch from Phase 9 to 10 (Second Marble Core Phase):
Phase 9 Taunt: “Enough! Pillars, serve your purpose!”
Phase 10 Taunt (Second Marble Core Phase): Taunt: “Perish, blights upon this realm!”
During Phase 9 MBC will circle near the edge of the room. I HIGHLY RECOMMEND not circling with him during this phase. The reason for not circling is because when MBC moves into phase 10 it spawns 2 special Marble Rocks that will orbit the room. These rocks will instakill you if they manage to spawn on top of you. Also, watch out for the gray balls that come from the center at a fairly fast speed. ( Silence for 4 seconds and do 80 armor piercing damage)

Phase 15 (Final Marble Core Phase A.K.A Survival Phase)
Taunt: “You… YOU WILL COME WITH ME!”
MBC will spawn his 6 tentacles and spawn 3 Marble Cores. He will also shoot trios of pop rocks which you must try to avoid. The shots I recommend avoiding are the blue( Pet Stasis for 3s), green( Slow for 3s), and gray balls( Silence for 4s) Raid leaders in the voice channel may also urge people to push forward so when you do be wary of potential pillars spawning on top of the group and incoming pop rocks. (Both may instantly kill you)
Phase 17:
Taunt: “I CANNOT FAIL MY PURPOSE!”
The only parts of this phase you need to worry about are the ones where he rotates around the room while shooting and void arrows. When he rotates he either shoots yellow wheels( paralyze for 0.6s) or black wheels( petrify for 1s) that you must avoid. Getting hit by either of these shots in MBC’s path will result in instadeath if MBC manages to run over you. The void arrows will blind you, but the real danger is the number of shots and damage. (250 damage and blind for 2s)


![]()
Void Entity: https://www.realmeye.com/wiki/void-entity
This is the final boss of the run. Void has the power to one shot 8/8s so you must always be cautious. The void for most of its lifetime will be circling around the platform. Void entity is vulnerable while it is circling, when it is in the center(Taunt: “ALL NOW ENDS!” is when he cannot be damaged while in the center), and of course chest phase.
Things to watch for:
Losing Tiles:
Losing tiles while Void Entity is coming around can result in a ton of damage or even in an instadeath. I prefer to stay 2 tiles away from the water at all times while void is running around.
Confuse Shots:
During the first phase and sonic you can get confused and run on top of boss. (Confuse lasts for 3s and pierces through players)

Void Lasers: They are extremely fast and are not melee friendly. (300 damage and silence for 3s)
Platform Split:
Getting caught while the platform splits can disconnect you, but the main danger is that you go slower in the water which makes dodging harder. The water also does 75 damage per tick.
Minions:
A commonly preached rule is to focus minions before the boss. Minions have the ability to swarm players with the ability to curse and pet stasis. (3s each but the curse shot pierces through players)If minions are not taken care of the will eventually evolve into the greater void shade which does an immense amount of damage but can be stunned.


Evolution of Minions:
 ===>>>
 ===>>>
Phase 9:
Taunt: “Brace yourselves, for this shall be the last battle your precious realm will ever see!”
During this phase the raid leader may call for everyone to go into the center to pop their effusions. Popping effusions helps speed up the run and negates groups from falling to minions. Void entity will spawn a Greater Void Shade in each corner during this taunt.
“Join us, heroes! The Void lusts for your souls!” is the next taunt.
Void Entity splits into 4 clones of itself which shoot high damage silence shots. All the shots silence for 3 seconds and pierce through players. Avoid the spinning wheels as they do 425 damage and be careful of the little blue balls because they do not have a straight trajectory path.


One thing I personally love to do while the void is split into 4 clones it to have my screen centered. The centered screen allows me to see shots coming from every direction which is advantageous. I also believe that standing ahead of the void entity while he is moving around is a fairly safe spot while dealing tons of damage. Priests and Paladins should prioritize dodging as they are the main source of sustain. (Especially priests) During this phase, I rarely ever look at my character, but instead, I use my peripheral vision to plan a map of the trajectory paths. Doing this has allowed me to take the least possible damage.
Phase 10(Shotgun Phase):
Taunt: “ALL UNDER MY CONTROL!”
The 4 clones will stop moving and shooting temporarily. The void will reappear at the center and command all the clones to start shooting. There will also be 12 waves of shots which all deal a high amount of damage. During this phase, I still have my screen on center to see the shots from both the clones and Void Entity. I HIGHLY RECOMMEND just spamming your hp potions during this phase since you will not have a use for them later.
Fun Techs:
Helm of Draconic Dominance: ![]()
I love using this item if I am in a group that I am confident has the ability to permanently buff the group without my help. It gives you 250 health on use which can make the difference between life and death.
Void Blade: ![]()
This is my favorite item to use in The Void. You can stand at the very edge of the platform and start stacking up the damage. You can do this is because you can place the projectile 0.5 tiles off your character which allows you to stay off the water while allowing you to hit the Void Entity safely. I recommend walking away into the center when the Void Entity is 1 platform away from yours. You get your damage in and now you have a good spot to dodge from. It’s like this item was made for this dungeon!


