
Hopefully, CH is the right place to categorize this. If not, please change it.
Anyways. An approximately two-year journey through this Forum has gotten me quite far with pixel art. I’m still not the best at it…obviously. But I’ve made a lot of improvements. I made a little gallery below to show you how ridiculous my old sprites were and my sprites now.
![]()
![]()
![]()
![]()
![]()
And after a lot of practice and time, I decided to make this small tutorial.
The Basics (Drawing Our First Item)
This short tutorial series is for people who have never tried or have little experience with pixelated RotMG art. If you already know the basics and would only like the tips on improving your art, go to the Drawing Lessons.
PART 1 - Getting Started / Sizing the Canvas
The tool I will be using for this guide will be Piskel. It’s a free online tool that works on any device (maybe not mobile, I’m not sure). It requires a network connection but can be downloaded as an application for places without WiFi and such.
Click below to travel to the amazing art tool!
https://www.piskelapp.com/p/create
(Life Tip: Always read the link carefully before clicking it to make sure it’s safe!)
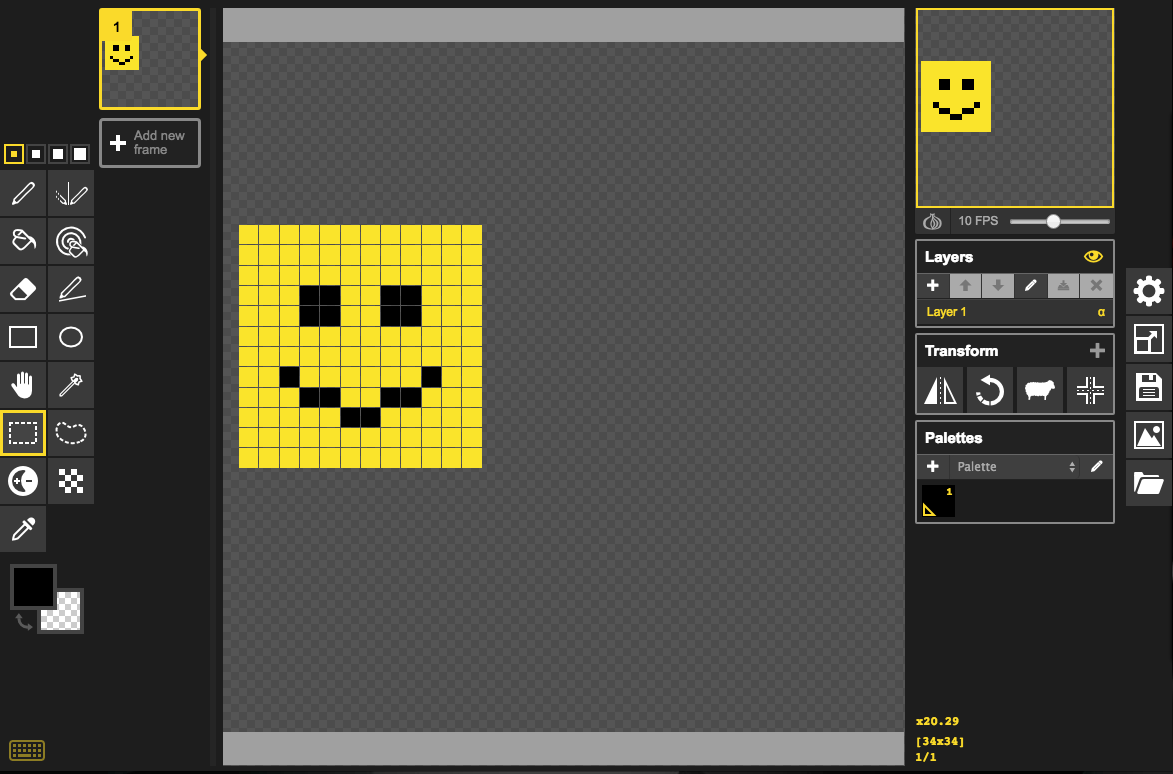
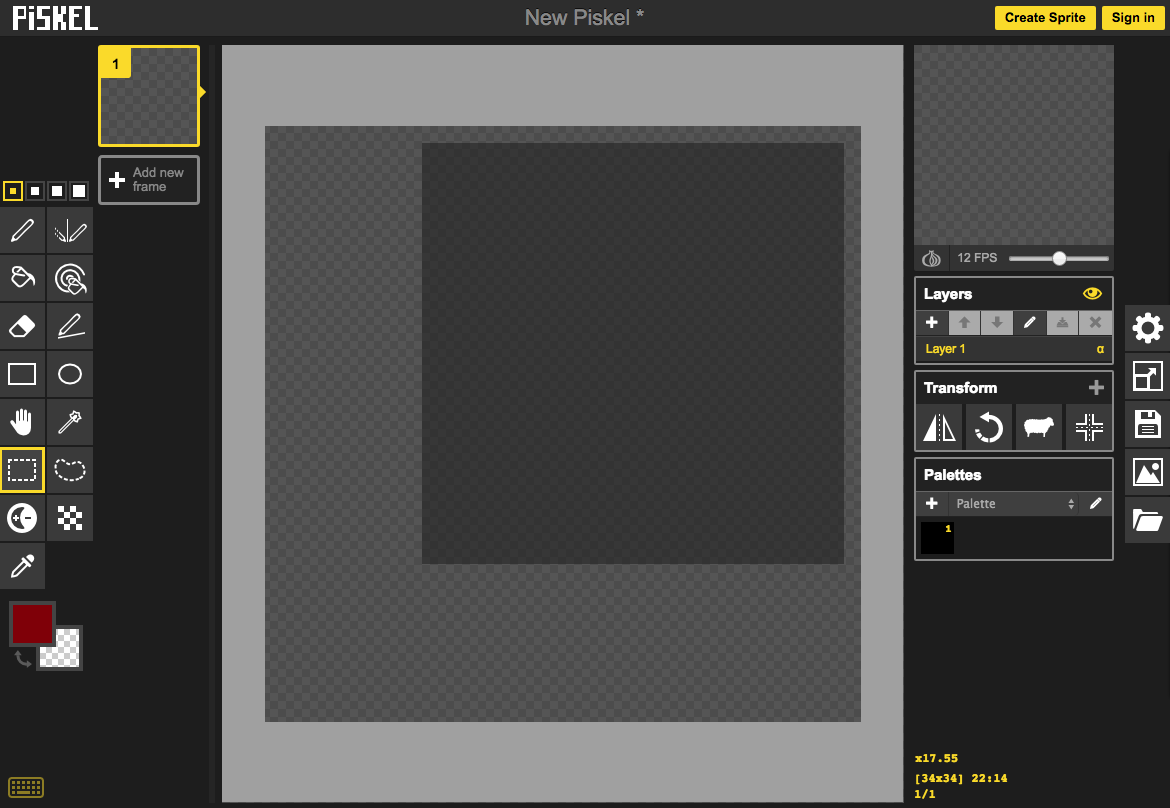
Now that you’re there, you’ll see an empty canvas that you yourself will soon be digitally painting on!
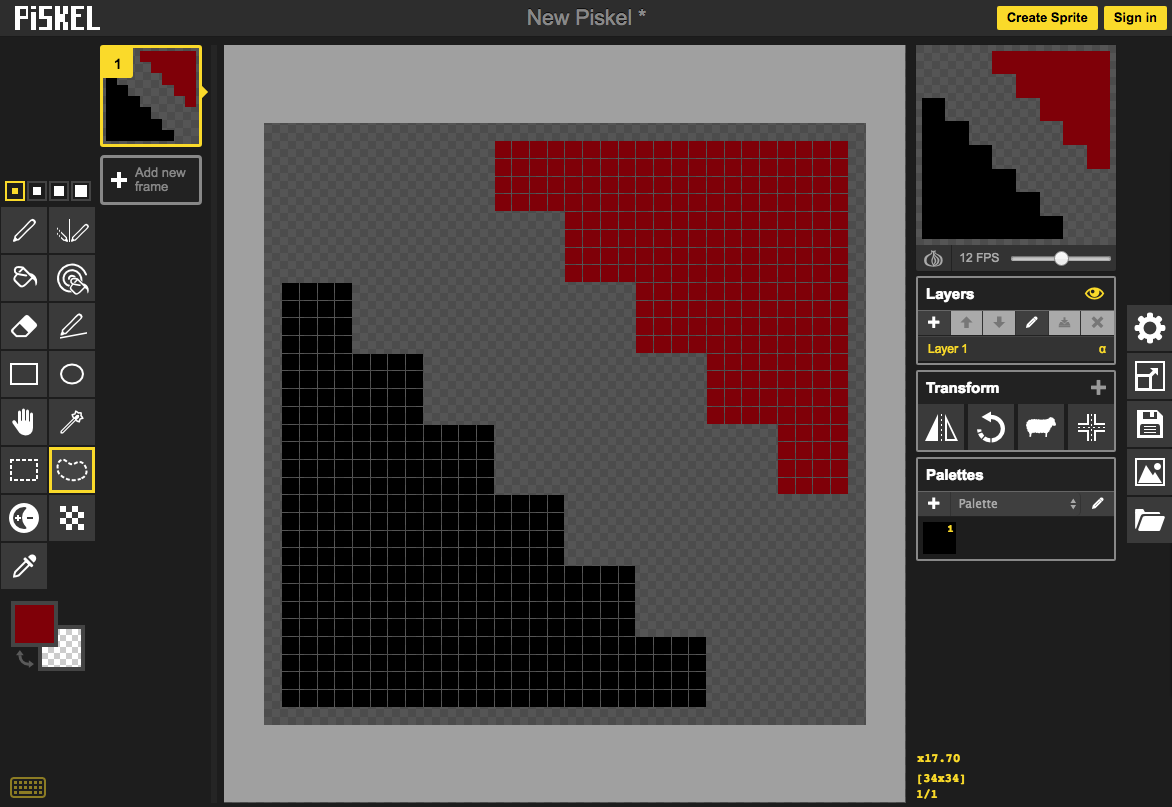
But if you have never used Piskel, you’re probably confused, so I’m going to break everything down.
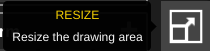
All the way on the right-hand side, you’ll see these five icons. The only one you need to know right now is Resize. Resize allows you to change how big/small you want the canvas to be. This is useful for making different sprite types (8x8 and 16x16).
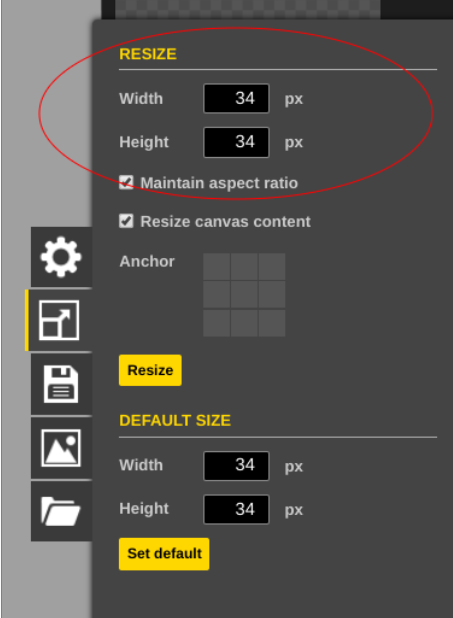
For 8x8 sprites, you want the canvas size to be 34x34. 32x32 and +2 for each to add the outline.
For 16x16 sprites, you want the canvas size to be 66x66. 64x64 and +2 for each to add the outline.
Our first lesson sprite will be an 8x8 dagger, so click the Resize button and change the default size of 32x32 to 34x34.
(TIP: While you’re at it, change the Default Size to 34x34 as well. This way, every time you open the site, the size will automatically be 34x34. The Default Size is below the regular Resize.)
Perfect! Now you’re ready to start!
PART 2 - Setting an Outline (OPTIONAL)
Before you start drawing, there are some important steps that will make the entire process easier.
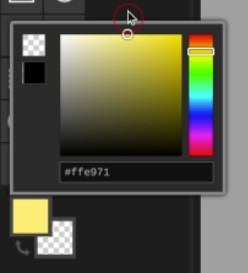
On the left-hand side will be the Tool Section. Over here, you can choose different art tools, each with their own unique and useful purpose. Below that will be the color manager, where you can choose what color you want to draw with.
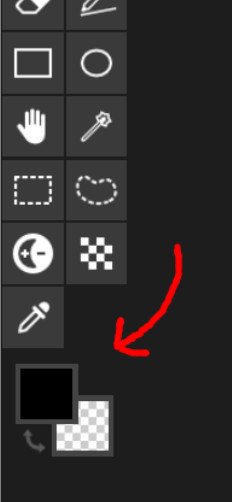
If you click it, a color-choosing tab pops up.
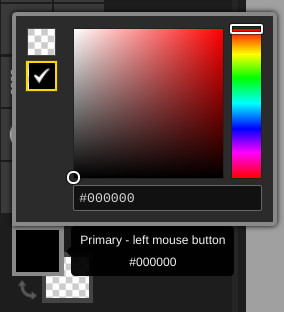
Make sure the color is set to black. This is the default, but it’s good to make sure.
Click the Paint Bucket tool (or press B).
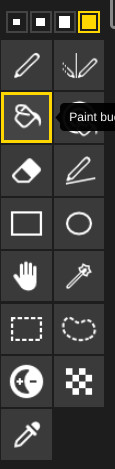
And then click the empty canvas.

So now it’s completely black. Now you can actually draw.
PART 3 - Drawing
This is it! The actual drawing part!
The following steps were taken from a video I recorded. If the quality is crappy, that’s why.
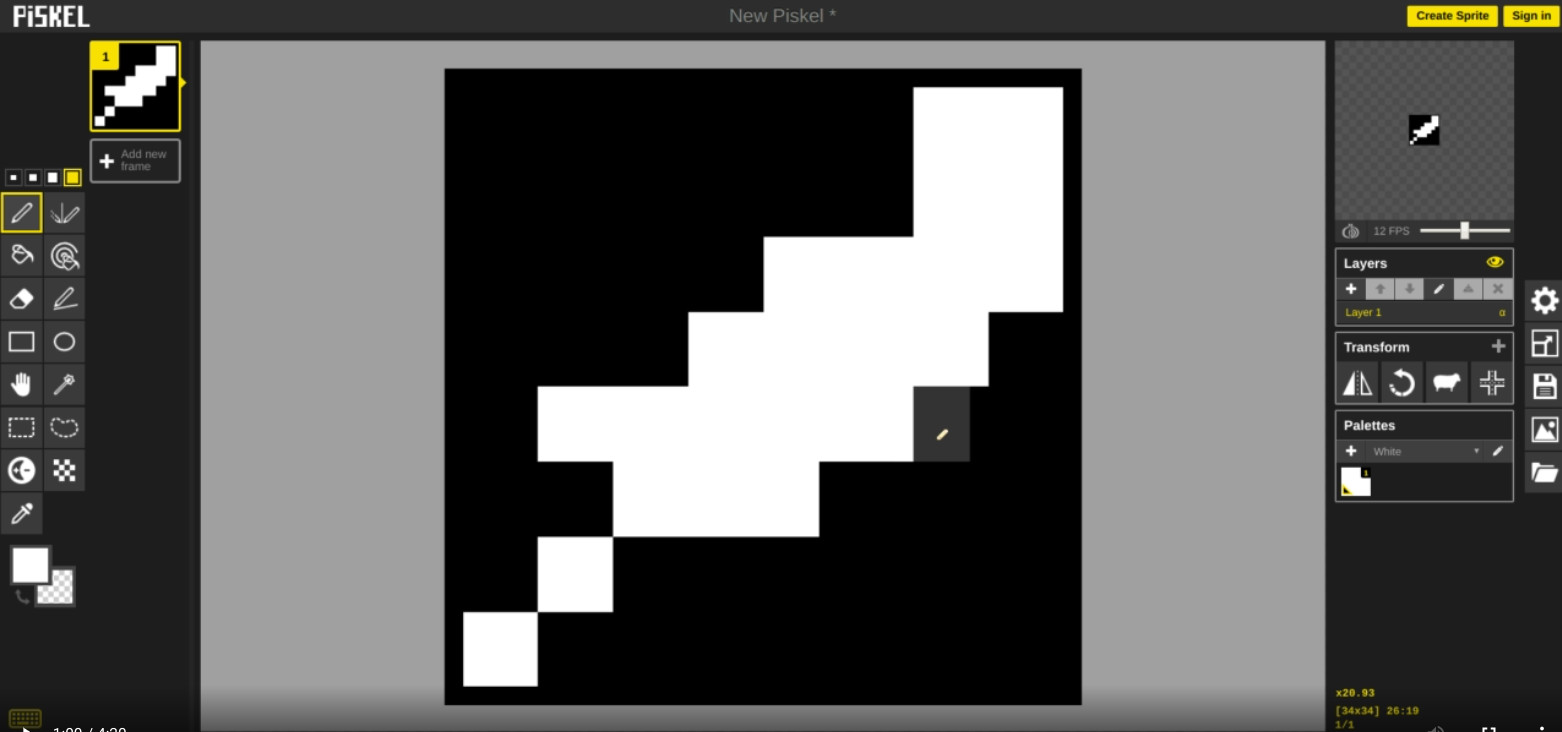
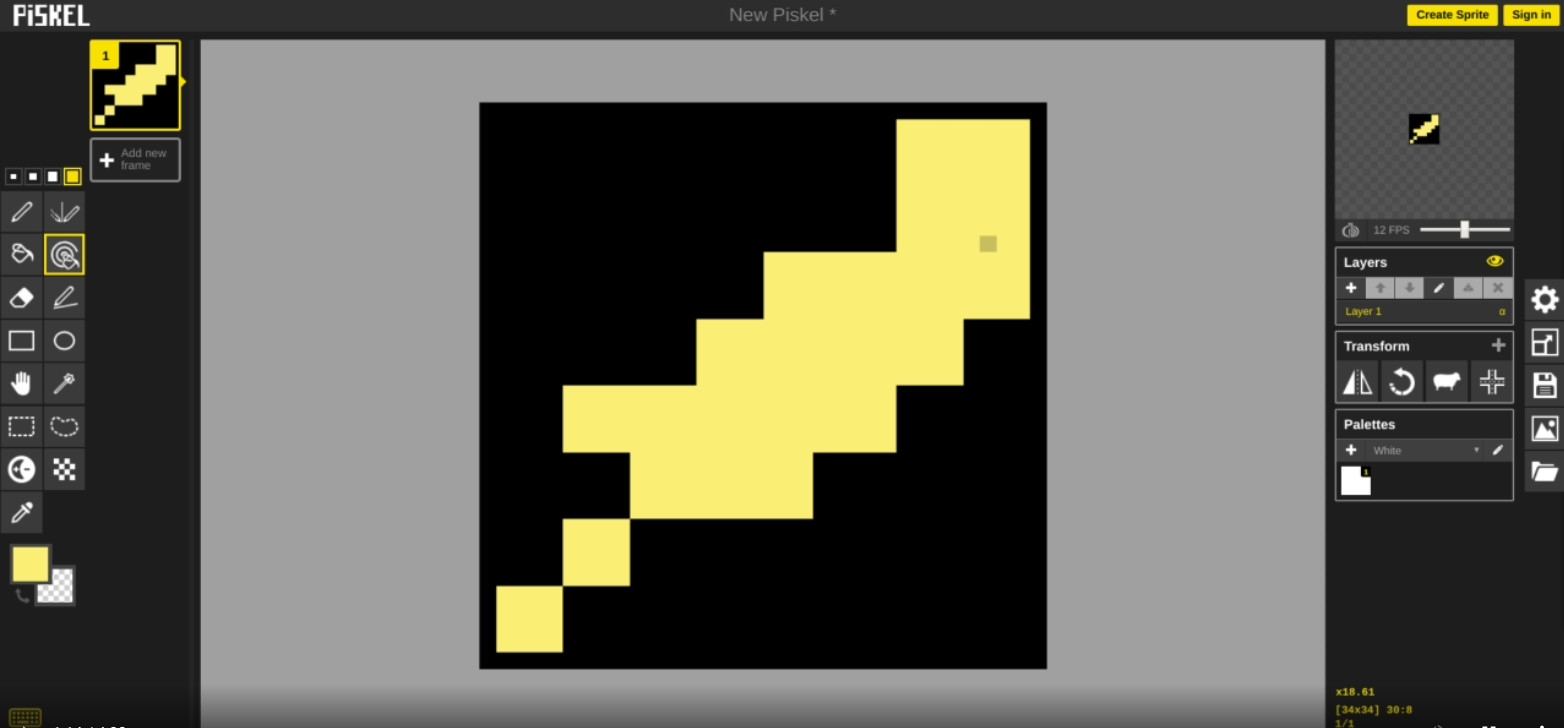
You want to first start by making a drawing base. To do this, use white to make a rough shape of what you want the sprite to look like.
Once you’re done with that, pick a base color that you want the sprite to have.
Now click the “Paint all Pixel of the Same Color” tool (or press A).

And click the sprite. This will paint all of the white into that color.
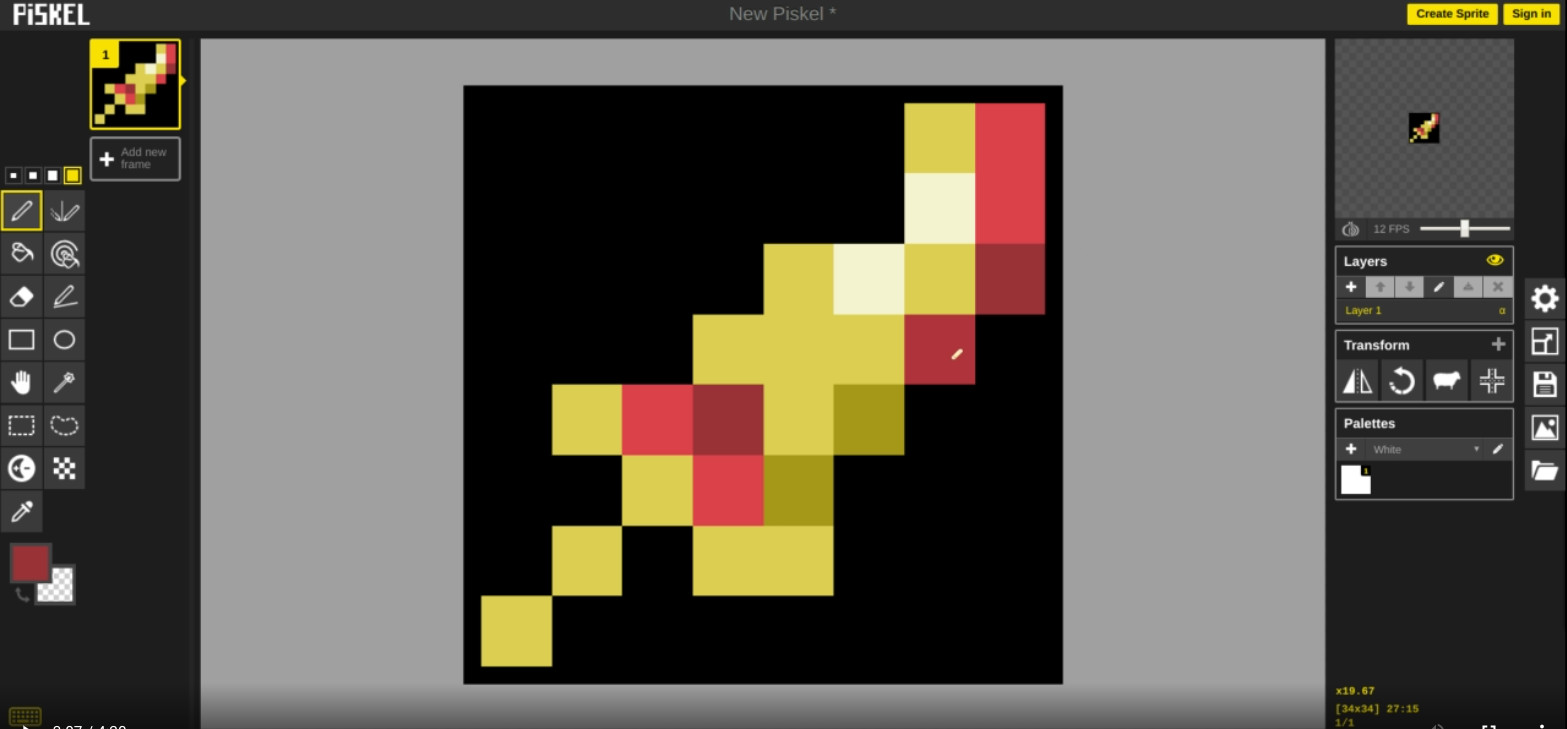
Now add some basic shading. We’ll go over more advanced shading later. For now, just edit the color so that it’s darker or lighter and add it to the best spots.
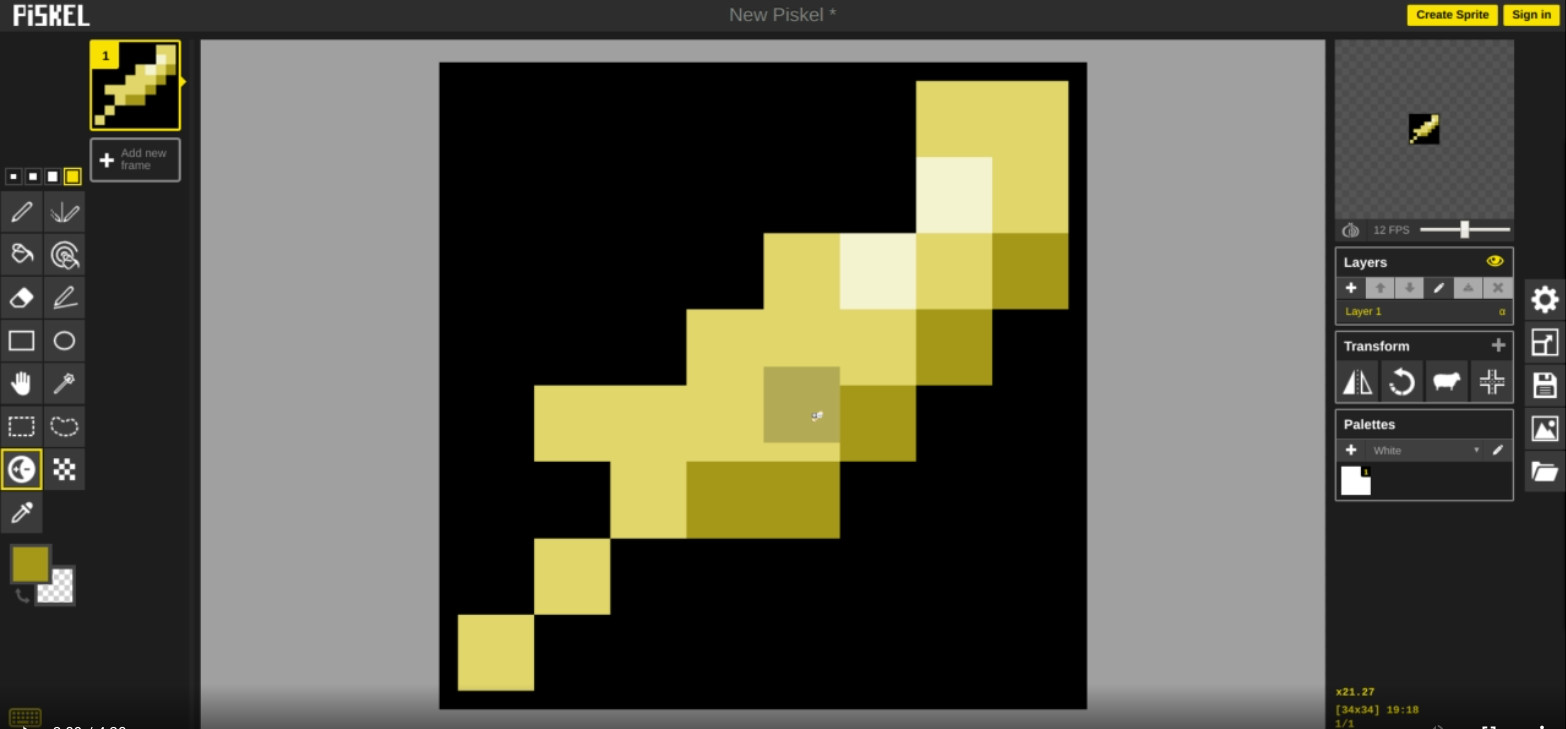
Now it’s time to add features and detail. This is the most entertaining part for me because there are so many different ways to design sprites.
So we’re nearly done with the sprite. Click the Eraser tool (or press E) and clean up the black background so an outline can be shown.
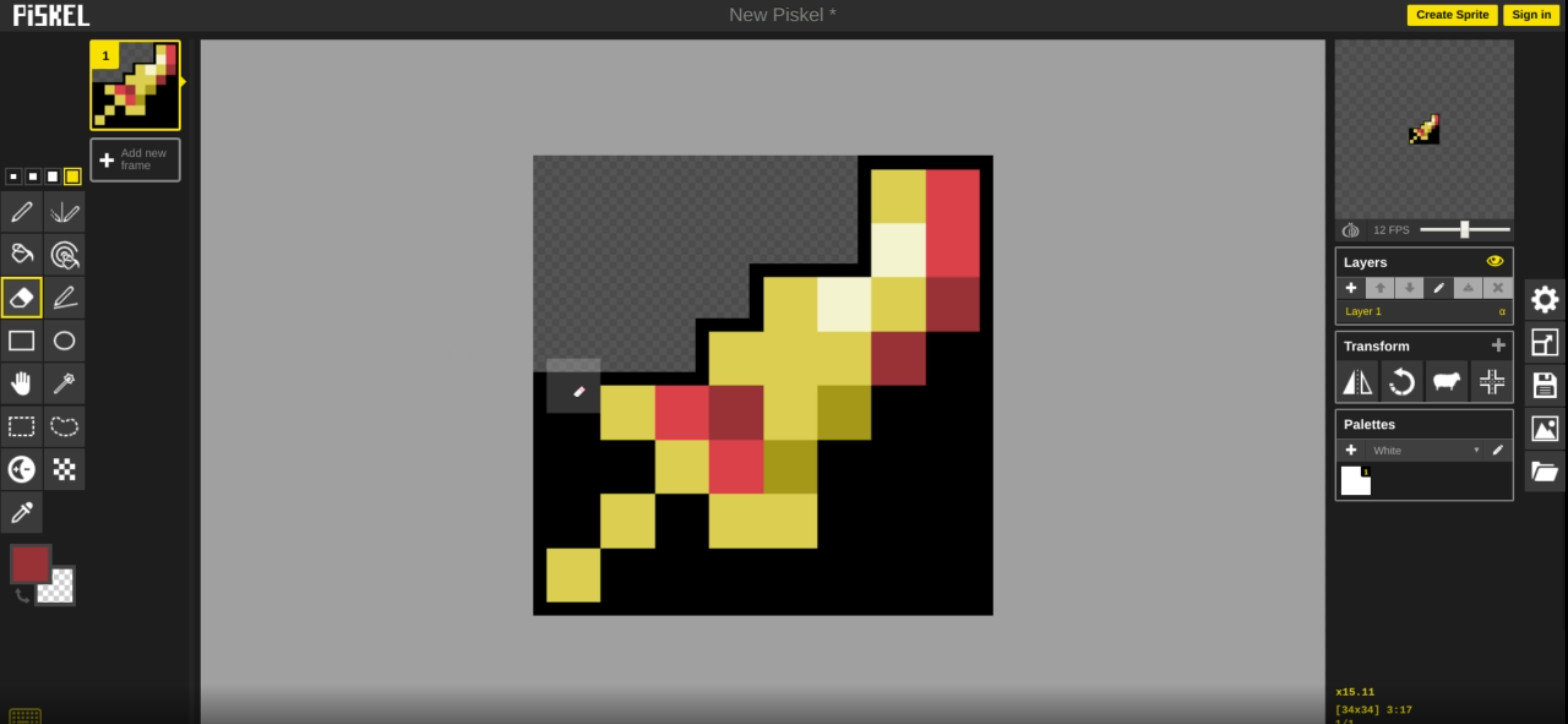
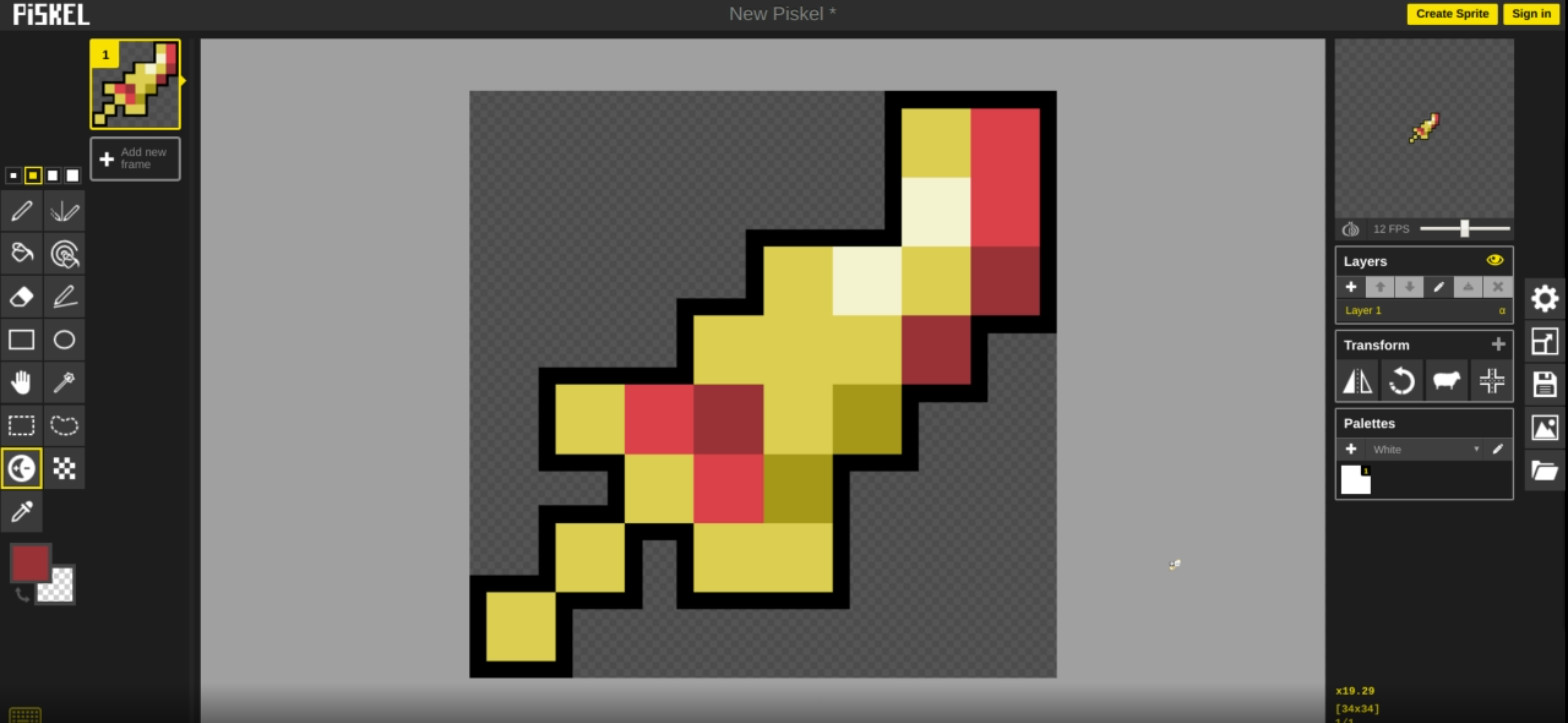
Add some finishing touches. Nothing too big.

PART 4 - Exporting
Go to the right-hand side with all of the icons. Fourth from the top will be the Export Tab.
Click it and it will give you a bunch of options.
There several ways you can export your work.
If it’s a one-framer like an item, PNG is usually the most comfortable file format, but GIF works as well.
If it’s a multi-framer like an enemy or character with walking/attacking phases, I believe GIF is the only format that you can use (unless you want a spritesheet).
My preferred scale for downloads like these are x2 because x1 is often too small.
But it’s all up to you. Try them out and you can decide what’s best.

Spriting & Animating (Drawing Our First Enemy)
Drawing enemies is one of the most basic skills for those who want to formulate Dungeon ideas. However, making enemy sprites is considerably more difficult than making item sprites because they are often bigger and sometimes require animations.
PART 1 - Sizing the Canvas / Setting an Outline
(TIP: Setting an outline becomes more mandatory as the sprite becomes bigger. For simple 8x8 sprites, it is optional because you can easily draw an outline in the end. However, it is very time-consuming to do so if your sprite is 64x64.)
Your first steps is to decide what enemy you want to make.
If it is a minion or smaller enemy, it should usually be an 8x8.
If it is a Dungeon Boss or big enemy, it should probably be 64x64.
If you took a look at PART 1 of “Drawing Our First Item”, you’ll see the canvas size for different sprite sizes. But to save you time, here they are:
For 8x8 sprites, you want the canvas size to be 34x34. 32x32 and +2 for each to add the outline.
For 16x16 sprites, you want the canvas size to be 66x66. 64x64 and +2 for each to add the outline.
So go ahead and do that. I’ll wait.
…
Once you’re done with that, as we did before for the item, you’re going to use the Bucket tool to cover the canvas in black.
PART 2 - Drawing the Enemy
It’s drawing time now!
Similar to before, we’re going to start with a white base so we have a shape to work with.
Slap on the basic color now using the “Paint All Pixel of the Same Color” tool.
PART 3 - Animating Basics (IMPORTANT)
Let’s start with the very basics of animating.
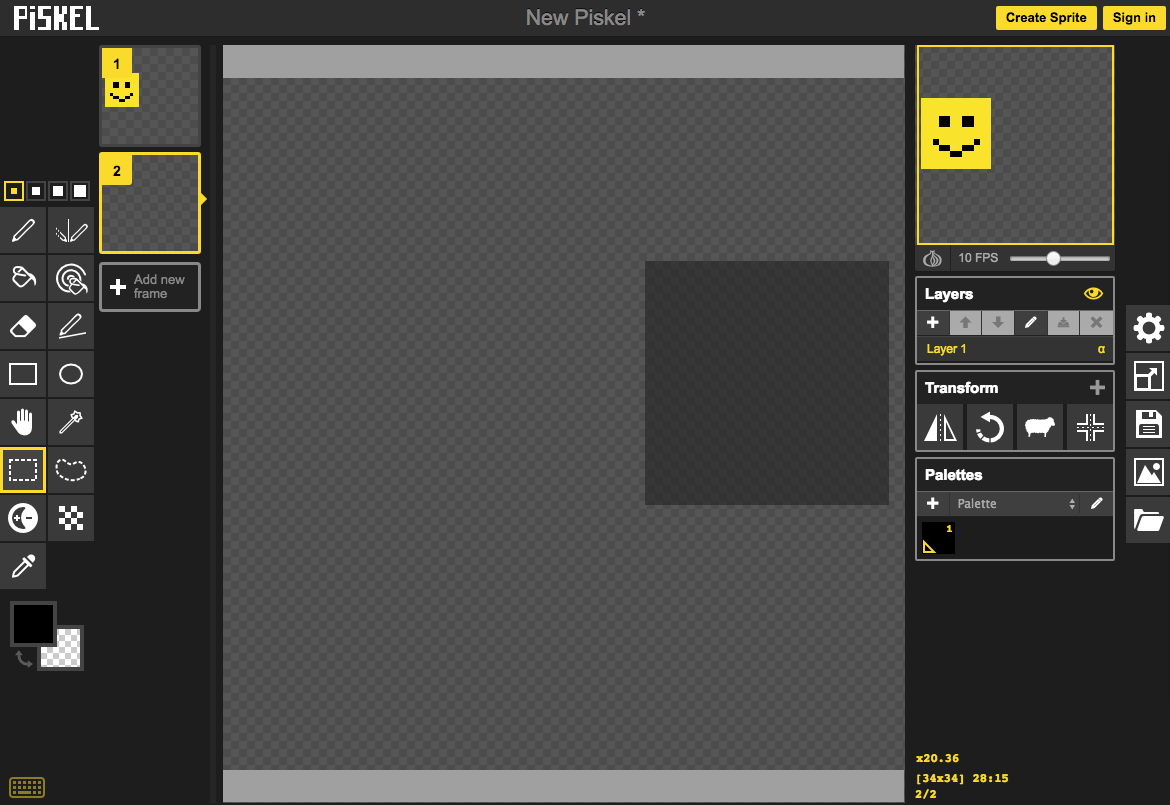
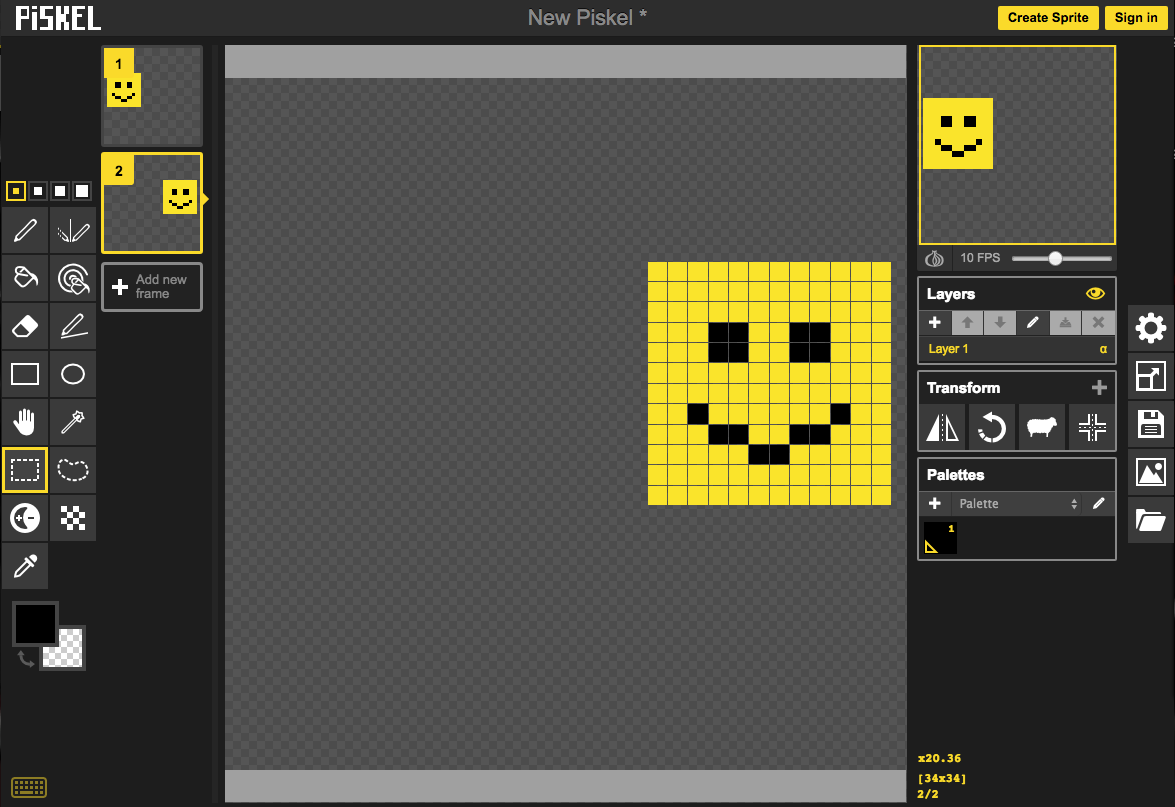
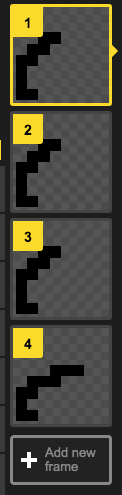
If you look at the top-left corner, you’ll see the Keyframe Section. The frames shown there are the frames that will make up the animation. Since we only made one frame, the sprite does not have an animation.
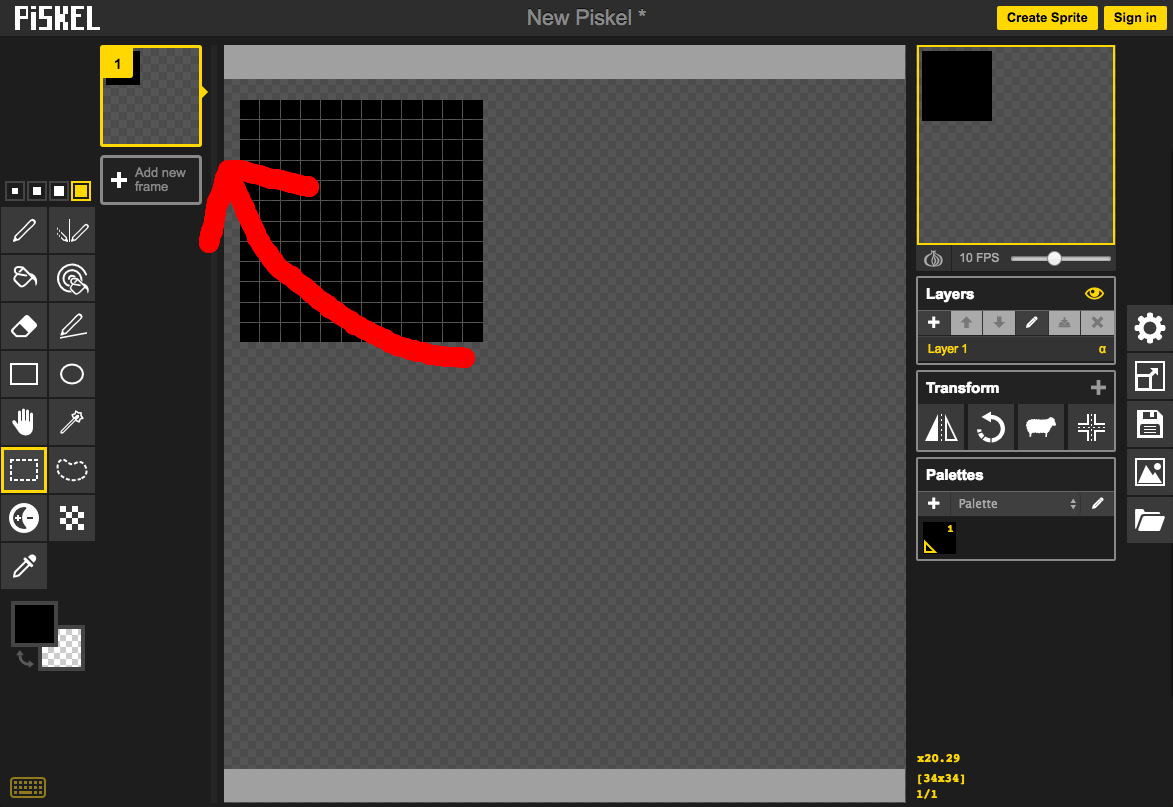
But, for example, if we make multiple frames like this:
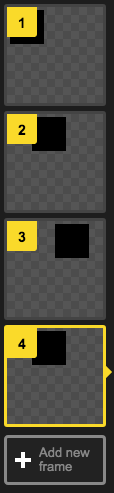
…the animation will be present (which I will show in a moment).
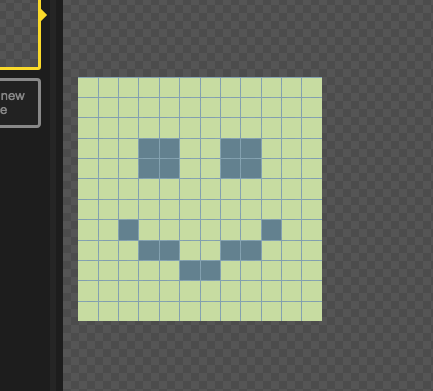
Now, this below is what I call the Preview Box. It can be found in the upper-right corner of the screen. It will show you the actual animation and what the sprite will look like once you download it.
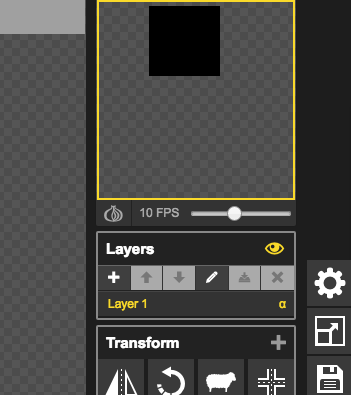
The little sliding scale below it (the one with the FPS next to it), as you may have guessed, changes how fast the animation is.
So we’ll show the final product of the example.
One is at 5 FPS and the other is at 10 FPS.


But wait! There’s an important thing you have to know!
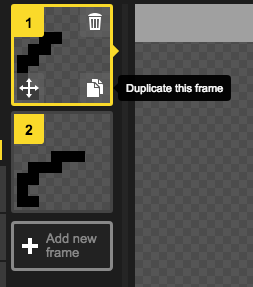
If you hover your mouse cursor over the keyframes, you’ll see some options that are extremely helpful to know.
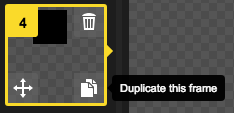
The trash can icon is pretty self-explanatory – it deletes the keyframe.
The one below that (the two papers) is the Duplication Tool. It essentially clones the respective frame.
The Duplication Tool is great because instead of manually drawing the keyframes. You can clone the previous keyframe, use the Select Tool, select the sprite, and drag the sprite (while holding Shift) to your desired location.

PART 4 - Animating the Enemy
We’re done with the basics of animating. We will now do the actual stuff, where we make our beautiful creation move.
THIS PART IS STILL WIP. sorryyyyyyyy :<
Drawing Lessons
This collection of tips is for those who want to improve their pixel art skills. Just note that these aren’t particularly revolutionary, so experienced people will most likely know some of these.
LESSON 1 - Drawing Tools and Key Shortcuts
The tools and shortcuts are for Piskel users only.
If you’re planning on drawing many sprites on Piskel, memorizing the Keyboard Shortcuts is an essential investment. It’s not all too hard, either.
There are 15 different tools in the Tool Section, but the only ones you have to memorize are the ones that you will use the most:
Pen §
Bucket Tool (B)
Paint All Pixels of the Same Color (A)
Eraser (E)
Color Picker (O)
Here are the keys:

LESSON 2 - Shading (IMPORTANT)
Shading is a basic art concept. It is easy to understand but takes a lot of time and practice to skillfully use. The most common problem that I see among sprites is that they do not use shading correctly.
Like said before, I’m not the best at it, either. However, I will try my best to demonstrate it!
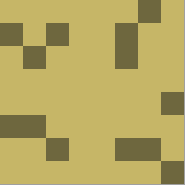
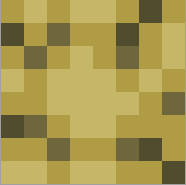
Let’s take a look at the sprites below.


It’s clear that the one on the right is arguably a better sprite. That’s because it has a better contrast between the shadings and provides more depth.
(TIP: Metallic items like swords and daggers should have more contrast between shadings.)
If you don’t know what I mean, take a look below:


The left one is dull and has less contrast, while the right one is more shiny and “metallic”.
Maybe even go as far as this:

Shading a lot can have upsides and downsides. While it can look more realistic, it ruins the comical theme, which is important for RotMG.

And sometimes it can end very horribly.

If you want to keep the basic “nostalgic” theme, limit yourself to 3 shades per color.
LESSON 3 - Pausing and Manipulating Animations
There’s a common problem that I run into very frequently, and you may too if you animate sprites a lot. Here’s the problem:
Look at the animation below.

I want this example enemy to have a pause between strikes.
I could lower the FPS like this:

But that makes the attack look slower/weaker.
The solution to this is to use the Duplication Tool to clone the pause keyframes.
So now the output animation is fast jabs with pauses in between.

LESSON 4 - Using the Select Tool Like a PRO
Throughout the time I have spent using the Piskel application, I have come to greatly adore the Select Tool. It saves so much time and hassle.
Its two purposes are to:
- move sprites across the canvas
- copy and paste sprites
So here’s how you use them efficiently.
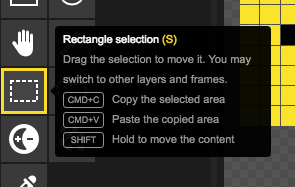
There are two types of Select Tools in Piskel – Rectangular and Lasso.
In case you don’t already know, they can be found here:
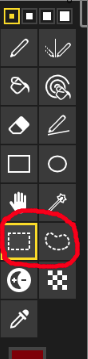 :
:
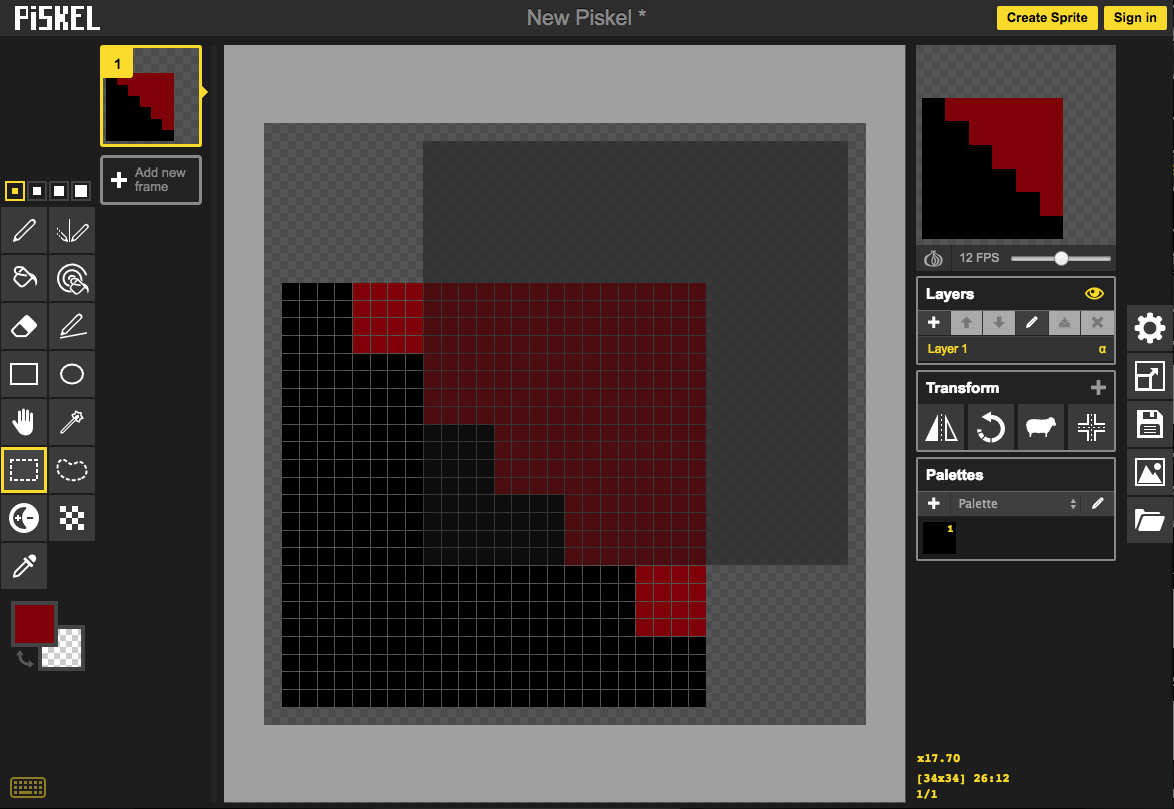
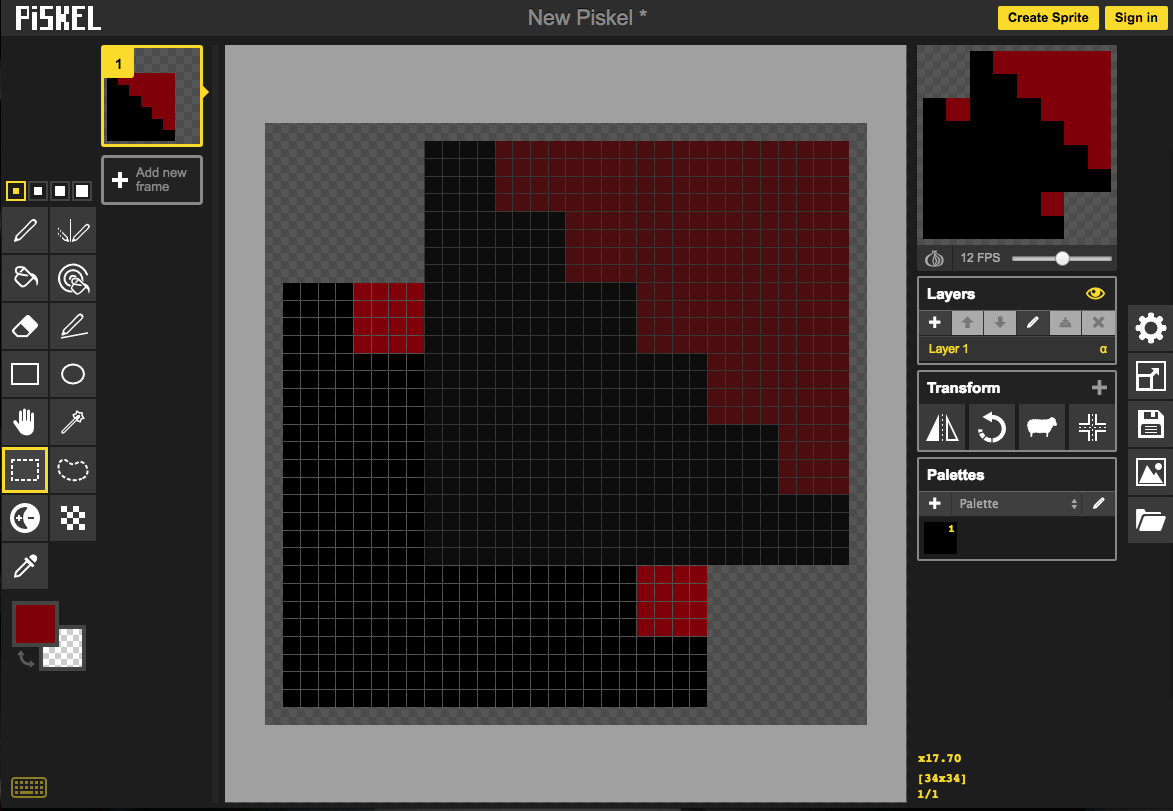
I will first show you the Rectangular one.
To select an area, click and drag.

To move the selected object, hold down Shift and drag it to the new location.
To copy and paste the object, make sure you have the area selected before pressing CMD+C (or whatever your copy shortcut is).
Then drag the selection box (don’t use Shift) to your preferred location before pressing CMD+V (or whatever your paste shortcut is).
Voila! Just copy and paste! Just like the time you plagiarized that random article for your English essay!
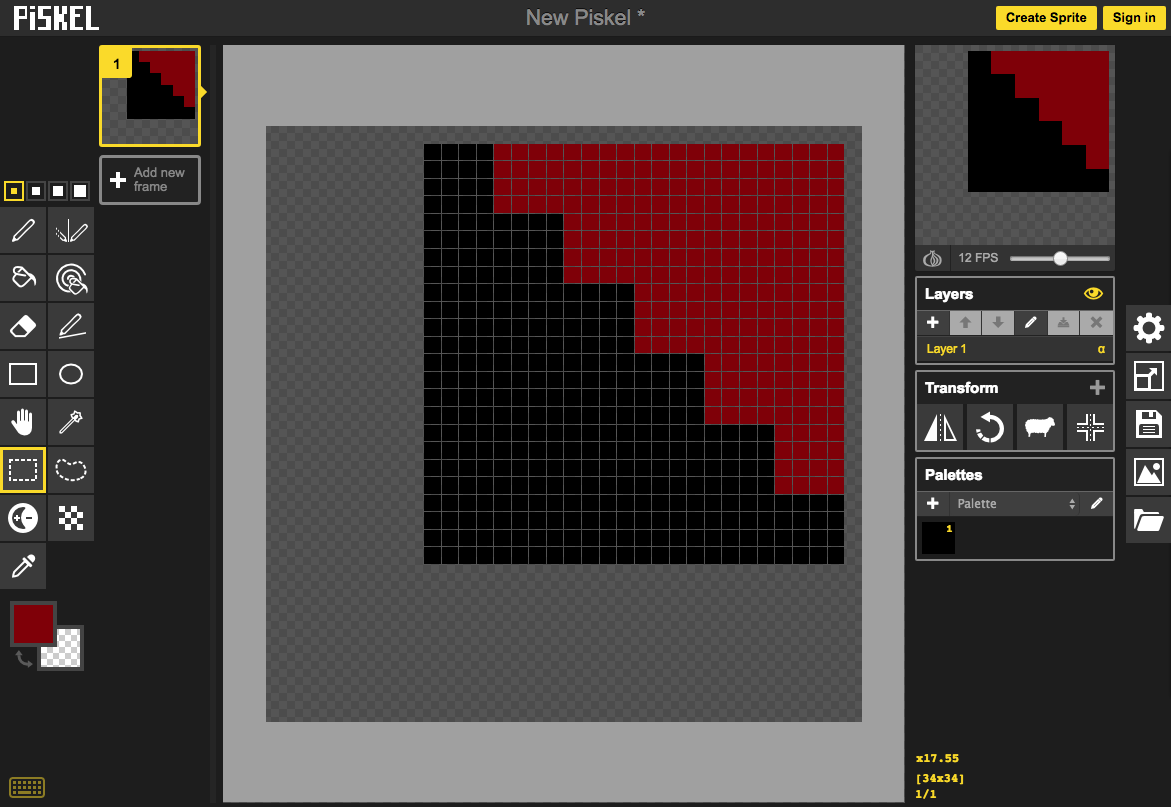
The Lasso Selection tool is essentially the same, except it sacrifices some time in exchange for accuracy.
I can’t really describe how it works, but here’s what it looks like. In this demonstration, I will be separating the red from the black in a matter of seconds!
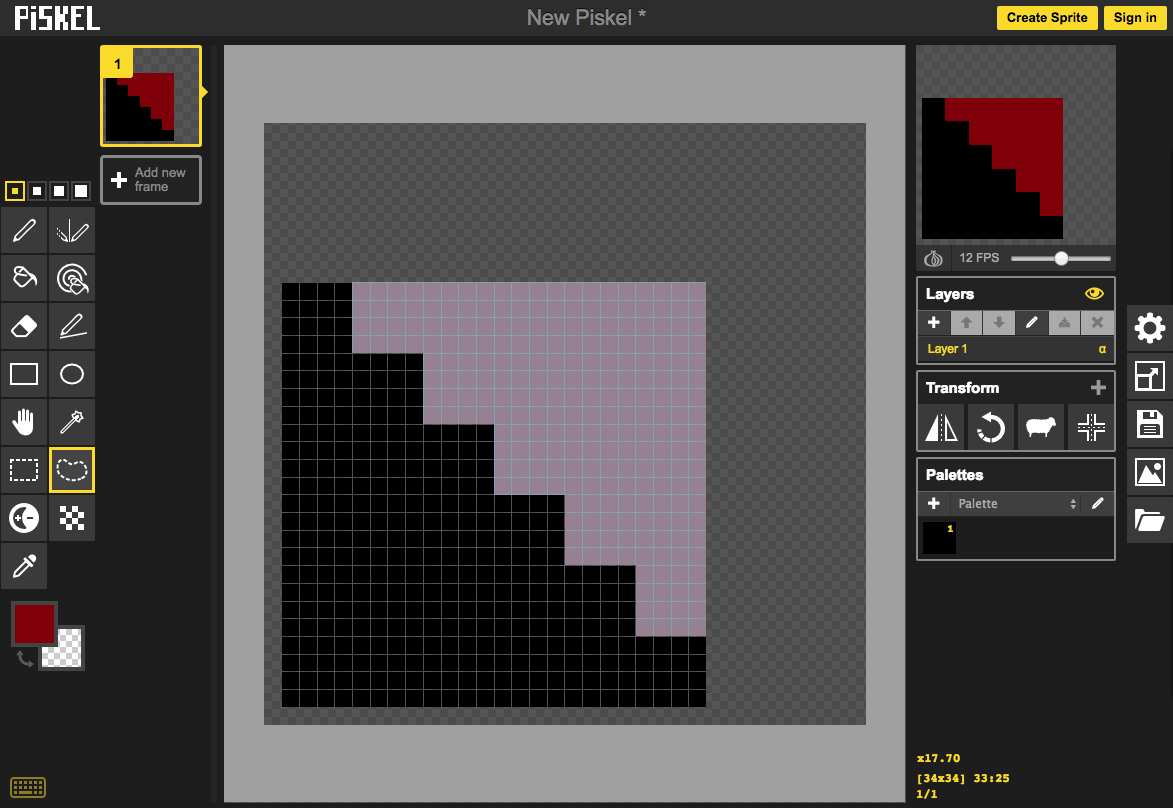
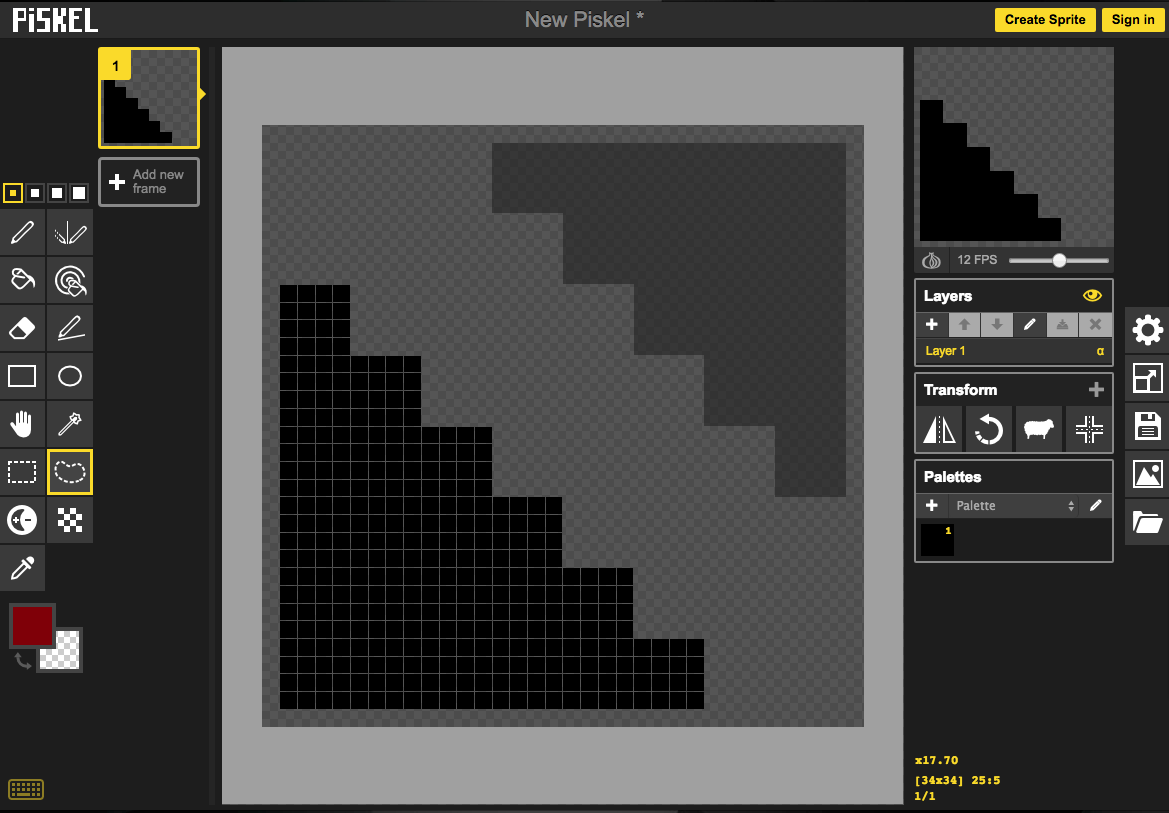
Since I can’t explain it, the best way for you to understand is try it for yourself.
LESSON 5 - Adding Cracks to Tiles
Believe it or not, just a few cracks can make a sprite pop out much more. Cracks are usually done on tiles, but with care, it can be done to enemies as well. It is best to only do this to rock-based sprites, however.
The main objective for adding cracks is to make the sprite look more aged and ancient – perhaps even worn down.
Step 1: Add the basic color. Pretty easy.

Step 2: Add the cracks. Try to put them on the edges.
Step 3: Darken the pixels next to the cracks. This adds more depth.
Step 4: Darken some of the cracks themselves. This adds even more depth, showing that some of the cracks are deeper than others.

Designing Dungeons
TILED
Free software available on Windows, Mac, and Linux. An amazing tool if you want to design a Dungeon room. I am using it for my current Dungeon project. It’s super easy to use and has a lot of cool features.
Xaklor made a guide on it. It’s available here.
To download it, click “Download at Itch.io”. In the next page, select “Download Now” and a tab will pop up. You’ll see a bunch of options having to do with money. This where a lot of people say, “Gamma, you said this was free!” and completely miss the fact that paying is optional. It’s just a way for developers to gather donations. If you’re not going to donate, click “No Thanks” and you’ll bump into the download page. Click the one for you platform and I’ll let you handle the rest.
Speed Drawing
This is a super cool method that I discovered very recently.
It allows you to quickly draw sprites without having to manually outline. Plus, it adds a shadow as a background, which is really nice effect.
How to Do It (5 Simple Steps w/ Pictures)
1. Go to the RotMG Art Maker
2. Make the sprite.
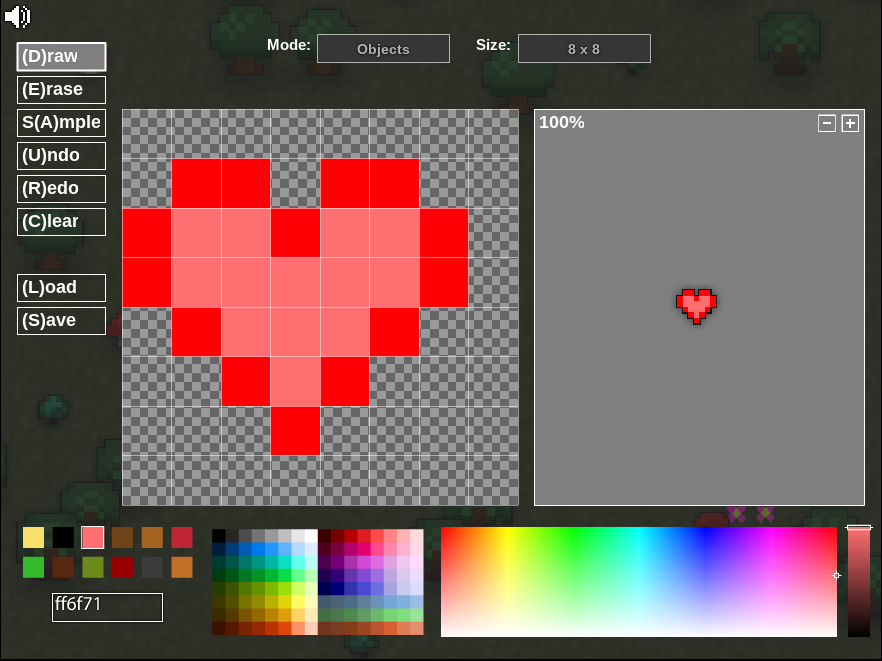
3. Screenshot the sprite

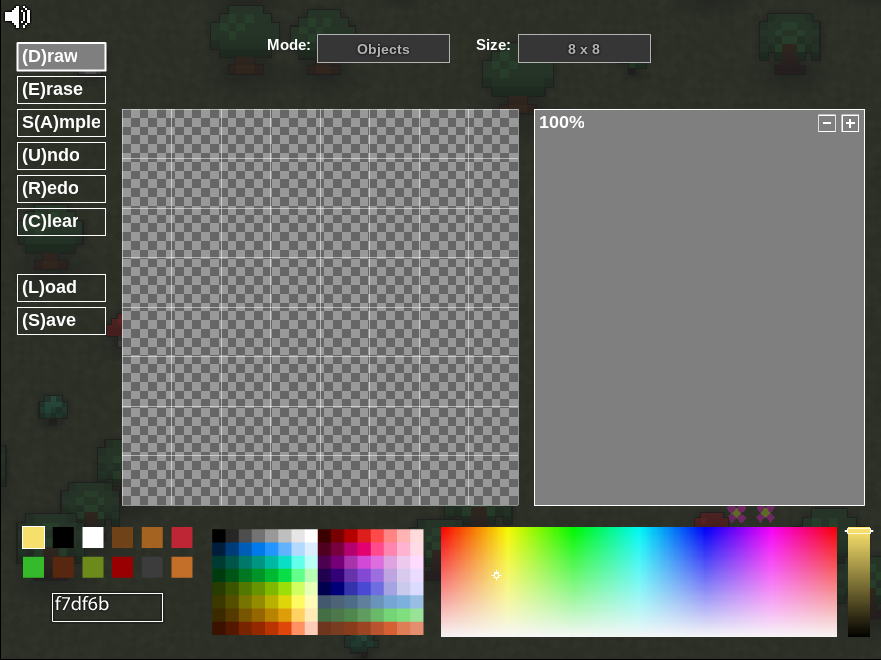
4. Go to Favicon Image Editor

5. Click on the File menu and import the screenshot.

6. Use the Magic Wand Tool to get rid of the gray background.
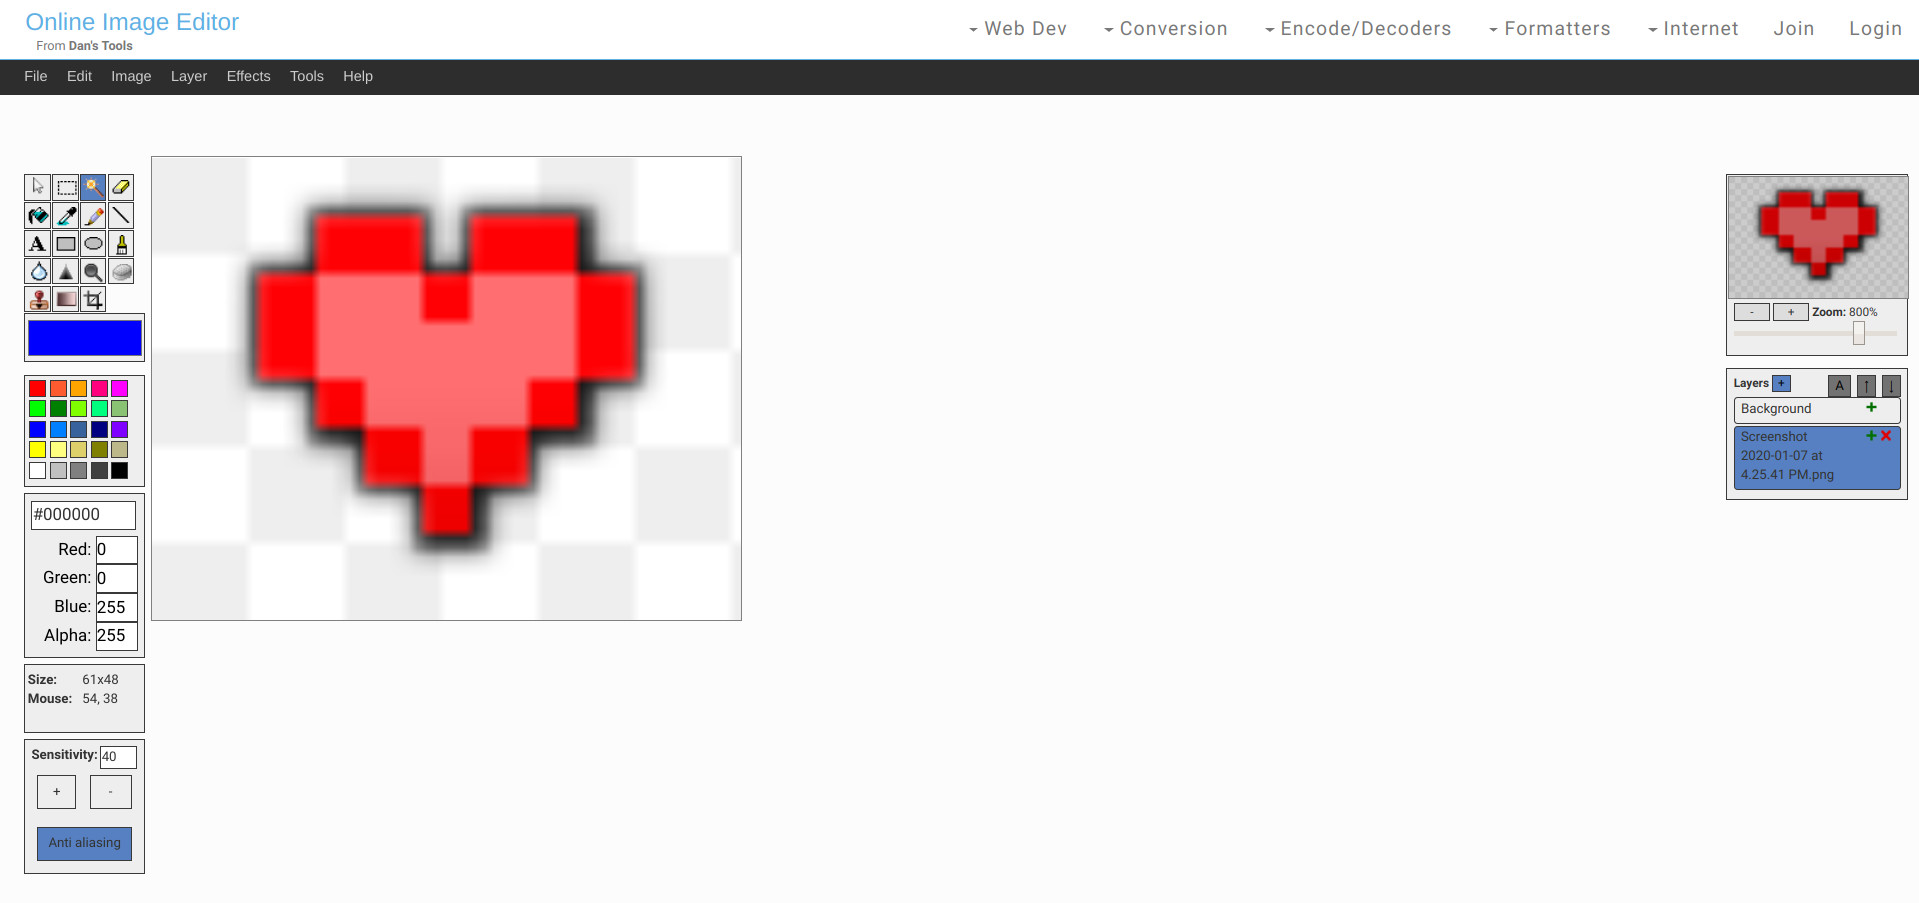
7. Click on the File menu, Save As, then OK.
This is the actual product.
![]()
This sort of makes all of my hard work above kinda useless, so I’m sort of annoyed. xD
More will probably be added as time passes, but for now, that’s all I got.
Best of luck in the Realm,
– Gamma 
