
Back to top
Manor Treasure Room:
Certain groups of 4 bookshelves may register damage if they are shot at. Shoot them completely and you can go into a treasure room with two coffins. If a coffin spawns a swarm of bats and a Nosferatu after being attacked for awhile, it has a chance of dropping the unique Manor items, with a guaranteed chance of dropping Holy Water. However, the drop rates of the other UTs tend to be lower than those from the boss of the dungeon. Coffins can also rarely be found in regular rooms.
Enemies:
Coffins
Most manors have one coffin room, however, this is not always true. Usually, these coffins are hidden behind fake bookcases. They can also stand in any of non-hidden rooms. They may drop any of this dungeon’s UT gear, Wine Cellar Incantations, dungeon treasures,or Holy Water. Make sure to shoot all bookcases you see!

Coffin
These coffins have high HP and spawn Nosferatu’s and tons of bats.

Coffin Creature
These coffins are also summoned by Lord Ruthven during the boss fight. They spawn several Lil’ Feratus on death.
Example of coffins in a non-hidden room:
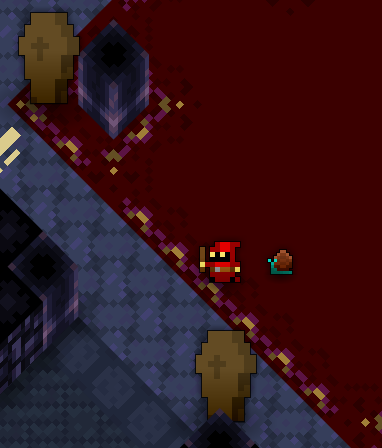
This can be a pretty difficult battle, especially without piercing weapons, high DEF, and not knowing how to control yourself while confused.
Phase 1: Lord Ruthven starts out vulnerable, and he shoots blades all around him; the number of blades he shoots depends on how much damage he’s taken. You should always keep your back to the hallway; this way, if you get confused, you can back out into the hall.
Phase 2: Lord Ruthven spawns Coffin Creatures on each side of his room (killing any coffins that are currently standing, which will then spawn Lil’ Feratus) and then transforms into a large group of bats, while summoning 3 extra groups. The summoned bats will chase you farther than the real ones will, so you might be able to figure out which ones are him. Either circle around the bats while shooting, or (preferably) back out into the hall. Piercing weapons are great for this. Eventually, he will transform back into himself, allowing you to deal a little more damage.
Note: Lord Ruthven can and WILL steal your HP. If one of his hits does, let’s say 100 damage. That’s how much he heals. So don’t abuse your healing capabilities and back away from them.
He will also immediately go invulnerable if stunned. However, it’s a great way to get in a bit more damage. Once you’re used to how much you hit him before he goes invulnerable again, using a knight, stun him and get a good 1200 extra damage in!
Soulbound Drops
Coffins in “Secret rooms” also drop these items, T9 Weapons and Wine Cellar Incantation.
Tips and Strategies:
Soloing Tips
If you’re thinking you brave enough to solo the Manor, then come prepared. It obviously won’t be easy unless you have maxed stats.
Note: Soloing the Manor is possible, but VERY difficult (unless you are a priest with a decent tome and wand). I highly recommend you have maxed defense before you attempt to solo Ruthven, to minimize some of the tougher hits. The enemy mobs are manageable; it’s Ruthven that makes this fight dangerous. It is imperative you keep the LIl’ Feratu mobs down! If you don’t, you may get overwhelmed by the swarms for a swift death. If at any point, you feel the Feratu swarm is becoming dangerously high, take a break from sniping Ruthven and drag some Feratus into the hallways where you can easily handle them!
Huntress
- That trap ability sure does come in handy, and with multi-shot bow (like a double bow), you’ll be able to clear swarms and handle with Coffins a lot faster. Whenever Lord Ruthven goes into his 2nd phase when battling him or if you’re dealing with Coffins, you can slow the huge swarm of bats when they’re starting to catch up. Although, you may have to plant a trap somewhere around and then lure the bats into it. You can enter with a lot of MP potions,
but try to stick with the bow unless you really need to use the ability.
Archer
- The quiver can do more damage and paralyze, unless you have a quiver below Tier 3. However, for better results, you need to be in a
perfect straight line with your enemies. Archers, obviously, can also use multi-shot bows. When battling Lord Ruthven, in his 2nd phase, you can use the quiver to slow or paralyze the bat swarms. Quiver of Thunder is a little useless when exploring the dungeon, however in the boss battle you can use it on Lord Ruthven.
Just don’t miss.
Wizard
- That spell ability will come in handy with swarms, Coffins, and for dealing damage on Lord Ruthven. However, Huntress is still better at crowd-clearing. Extreme Prejudice helps, but its a bit more dangerous and you may need to drink some Dex potions or have a good dex ring. Come with a lot of MP potions if you like to spam the spell ability.
Necromancer
- There will obviously be swarms of enemies waiting for you throughout the dungeon. Whenever you get low on health, you can find a swarm and use your skull ability. The skull is also useful for crowd-clearing. Just try not to spam it too much, though. The skull really comes in handy with Lord Ruthven and Coffins too. Come with MP potions,
but have some HP potions too just in case there aren’t much enemies close to each other.
Trickster
- Though many find her prism ability rather useless (or at least the decoy), it can be really handy. When under attack by swarms, you can teleport to a safe distance away from the swarm and have the decoy distract it.
Just make sure the decoy is heading the other direction other than your’s. Bone Dagger is useful here too. Again, a bit unsafe, but works rather good on clearing swarms. Come with a lot of potions. Both HP and MP.
Rogue
- Need I explain it??? Anyways, the Rogue can just run through all the enemies using his ever so useful cloak ability and head straight towards the boss (rush.) Planewalker is extremely useful here. However, you might want to max your Def and Spd first if you want to rush. The rogue is better with a Bone Dagger than an Assassin or a Trickster due to the fact that his cloak lets him come really close to his enemies without being detected. Come with a lot of MP potions if you’re going to rush, and have some HP potions too just in case of a slipup.
Knight
- Now, what you’re probably thinking is “Why would I use a melee class in a dungeon like Manor of Immortals!?” Well, if it weren’t for his shield ability, I wouldn’t be posting soloing tips for this class, now would I? Obviously you’re going to need all the Def you can get with Knight, and some Health too. The shield, again, can stun…
if it hits. Every single enemy in the Manor has a deadly shotgun, except for the bats, which deal damage and inflict confuse on contact. The shield also comes in handy with Lord Ruthven too. If you can get close enough to Lord Ruthven without taking too much damage, you can then use the shield and hack away at him (and then back away since obviously stun doesn’t last forever.) Ogmur is
EXTREMELY useful in this fight too. Despite the loss of the ability to stun, the Ogmur Shield can deal some damage and armor break. If you haven’t noticed, Lord Ruthven has very high defense but low HP. The Ogmur’s armor break ability, if it hits, will lower Lord Ruthven’s Def down to 0. Within a minute, or a few seconds if you have maxed Dex or something, Lord Ruthven can easily be taken down. Come prepared with A LOT of HP potions, and bring perhaps at least one MP potion to help with the MP regeneration process.
Warrior
- Warriors can do this dungeon solo if maxed. If you have the juggernaut, all of the better. Just clear your way through the dungeon(or rush if you’re into that). When you’re at Ruthven, just back out at the bats and dodge the shotguns. Bring hp and mp and it will be a relatively short battle if you know what you are doing. DO NOT STAND ON RUTHVEN EVER.
Priest
- The Priest can solo the Manor of the Immortals but he will need some maxed stats especially Defense, Attack, and Dexterity. The Priest can heal himself with the healing ability when low on health. Moreover with the UT tome, Tome of Holy Protection the priest can absorb some of the damage (but don’t get
shotgunned). If the Priest has a Purification tome with him he can purify himself when being inflicted by bleeding or confuse. The Priest can clear crowds easily with the Crystal Wand. Bring along some MP potions and an HP potion in case the Priest is low on Mana.
Ninja
- Since a ninja’s katana pierces, you won’t have to worry about being swarmed by bats. Although, high defense and vitality are required to compensate for the amount of damage he may take. The ninja’s star is also very useful for getting yourself out of sticky situations(i.e. hellhound charges). When at Ruthven, be sure to rely on your star for knocking his hp down. Just be sure not to miss because if you do it can be very costly. When he spawns bats and coffins, he can shred everything in his way. So, just pick off the enemies one by one, trying your best to dodge, until Ruthven turns back to normal.
Paladin
- A Paladin with a decent sword (archon+) can very realistically solo unmaxed. When his seal is active, you have the possibility of doing 500+ damage per hit, which can kill Lil’ Feratus spawned by Ruthven instantly. Never back into the hall on the bat phase as a Paladin, instead circle around and kill all of the coffins and Lil’ Feratus. Keep moving to avoid the bats. If you seal boost and finish in a timely manner, Ruthven will go vulnerable again with no Lil’ Feratus on the battlefield.
Drops of Interest

 Vampire Bat Swarmer
 Lil’ Feratu
 Nosferatu
 Hellhound
 Lesser Bald Vampire
 Armor Guard


 Lord Ruthven
 Coffin
 Nosferatu