
This dungeon can only drop from the Grand Sphinx. While it is suggested to be maxed to fight the Grand Sphinx, it is not required for survival. The Grand Sphinx has 3 phases, some are good for different classes, but are bad for others, here they are:
1. Weakening Phase- Great for anyone who does not want to risk anything but still do a little damage. During this phase minions chase players down. During this Phase the Grand Sphinx shoots tiny little fireballs at the closest players, it is a 3 shot shotgun that is very weak in comparison to her other phases. This phase is great for damaging the Grand Sphinx as she is 100% vulnerable, but her shots will weaken you if they hit you, anyone who is really good at dodging can do a huge amount of damage to her during this phase, and it is a great time to get your abilities shot at her without you missing or taking tons of damage. If you were for whatever reason, soloing this event, you could just keep fighting her on this attack phase only, as it is much safer, you can do maximum damage to her while she is doing minimum damage to you, win-win.
2. Fireball Phase- Great for Knights, Warriors with Juggernaut Helmets, Paladins with Seals of Blasphemous Prayer, Mystics with Orb of Conflict, and Priests. During this phase minions stay still and shoot 6 shots in symmetrically different directions. Though anyone can do some damage during this phase, those listed above have an advantage. Melee classes cannot do the maximum amount of damage during the Weakening phase because if they are close enough to hit her, then they are to close to dodge. This phase consists of the Grand Sphinx shooting big fireballs, and fireball walls that do MASSIVE damage to almost any players. While she is constantly shooting in a 6 shoot random pattern, she also shoots either one fire ball, a fireball wall, or a deceiving shot at the closest players. One fireball is just one fireball, but sometimes those “one” fireballs are actually deceiving shoots which are multiple fireballs packed into one, BIG HURT. When Dodging one shot fireballs, never dodge backwards, as one fireball is allowed to hurt you multiple times if you are as fast as the bullet, this can be hilariously pathetic. The Grand Sphinx also fires fireball walls which is just a massive shotgun of fireballs with no gaps in between, when dodging this you should always dodge backwards and sideways at the same time, if you dodge sideways you can get hit by all of them, if you dodge just backwards you can get hit by one multiple times, so be careful. This phase is great for those classes with armoring abilities, and for priests who can just heal spam themselves, and knights can get a chain stun going on the Grand Sphinx allowing for their maximum damage to be done. The Grand Sphinx is also 100% vulnerable during this phase.
3. Blind Phase- Great for Staff, Wand, and Bow users. During this phase minions stay still and shoot 6 shots in symmetrically different directions. In this phase the Grand Sphinx is not always vulnerable, meaning that you probably shouldn’t waste your abilities on her, as she might become invincible mid-shot. Her attack on this phase is a 340 light blast wall. Though it is hard to tell, she is aiming for the nearest player. She fires a high damage wall of light that blinds players when it hits them which means you will often be backed up so far that you cannot hit her. If you are a melee class, please don’t try to hit her unless you are a knight, as a knight can wait behind a pillar until she gets close enough for a shield bash. The only way range classes can hit her during this phase is if someone is trying to get closest to the Grand Sphinx exactly 90 degrees away from you, as the openings of her light wall blasts are about 10 degrees in length on both sides. For those of you who hate math, if someone is a quarter away from you on the battle field, on this theoretical circle around the Grand Sphinx, and they are a shorter distance from her than you are, then you will be able to use the very small opening in the attack wall to strike back at her. (did your brain just go boom?) This phase is not the best phase for anyone to get maximum damage in, but you can still get some damage in all the same.
These phases just repeat in a cycle after each phase has gone on for X amount of time, so if you want, just choose a favorite phase and only attack during that phase, and regain your hp and mp on the other phases. Though this boss fight might take a really long time if you aren’t in a good group because she has 60000 hp and 25 defense.
The Grand Sphinx can drop: Helm of the Juggernaut, Vit, and Wisdom pots.


This dungeon is one of three sources of Life pots (the others being the Arena and The Forgotten King), which increase your maximum health by 5 each time. You can find up to 3 life pots in this dungeon, others may also get some life pots but 3 is the most YOU can get out of it. Life pots are extremely valuable on the market due to the difficulty of this dungeon. This dungeon can also drop the super rare rings of the Nile, Sphinx, and Pyramid, which are considered very stable rings. If that isn’t enough for you, just know that there can be up to 4 treasure rooms in any given Tomb, which almost always drop defense pots and higher tier items, so even if you can’t beat the bosses, you can get something out of this place.
Aside from everything in the dungeon, there are many things that should worry you. Here are some descriptions and battle tactics of everything in the dungeon.
These are the floor tiles that constantly shoot bombs straight into the air that land directly back on the trap. There are usually a lot of traps in a room causing limited moving space, if you have cleared all the enemies out the room already then you can try to deactivate the traps. To deactivate a trap you must find the trap floor tile that is usually in the direct middle of all the collective traps in the room. Stand on this trap and it will say “1, 2, 3, Click”. Once it says click the traps will be deactivated, permanently, as in forever. Keep in mind though, to take out a trap it takes a total of 4 seconds, as click counts as a second as well, if you jump off the trap to dodge at 3, then the trap will be back at 1 when you stand on it again, so make sure you can pull it off before trying.
These non moving threats cannot be turned off or destroyed, when you approach their proximity they will shoot in an instant, dealing decent damage and a variety of status effects. They can Slow, Paralyze, or even break your armor, i.e. BAD. If you are trying to dodge a monster, just make sure you know what you are dodging into, we wouldn’t want any accidents. All white towers paralyze, all red towers break armor, and all blue towers slow.
Sand is bad, while you can not sink to the very bottom of the sand and die, it is a major cause of problems. Sand slows you down when you walk on it, the longer you walk on it the more it slows you down, your character can sink until only his eyes are showing, at this point you have about the spd of a level -3 knight. Walking through sand combined with a slow status effect means you are paralyzed, as you are so slow you will not move at all. Actually being paralyzed in the sand is not fun either, as by the time you could move out of the sand, you have been paralyzed again 4 times over. So be careful of how you move through the dungeon, watch out for when you can actually survive in a pool of sand.
These are basically the Fly swarms you see in the realm, except a 100 times worse. There are 3 different colors of swarms and 2 different types of swarms. The 2 different types of swarms are Masters and minions, Masters are large and have 3000 HP, while minions are spawned by masters and have only 200 HP. Masters deal more damage and have more attacks, that plus the quick speed of swarms can make them rather intimidating. The color of a Swarm is important as well, as they inflict different status effects with there shots. Red swarms shoot armor breaking bullets, Yellow Swarms inflict confusion and blind, and Blue Swarms weaken players.
A Tomb gang consists of 3 different types of enemies, this does not mean that a group is limited to 3 enemies. The three enemies are:
The Eagle, who is a warrior that has 4000 HP, 35 Defense, rushes players and does 70-90 damage per shot.
The Lion, who is a archer that has 3200 HP, 20 Defense, chases players from a distance and can slow or paralyze players while dealing massive damage per shot.
The Jackal, who is a priest that has 2500 HP, 5 Defense, does 100 or 140 per shot, and heals Lions and Eagles.
When fighting these make sure that you take priests out quickly if you can, and that you try to lure the other 2 types of enemies if you need to.
Tomb Jackals are the dark creatures adorned with Gold armors. A group of Tomb Jackals is lead by a Jackal Lord which constantly heals and spawns the other types of jackals, he is also a fan of chasing players down and camping behind unexplored corners. Jackal Lords have 6000 HP and 40 Defense and does 140 damage per bullet. Make sure to take him out first because there is no point in shooting the other jackals while he is still alive. If you can take out a Jackal Lord you won’t have any problems out of the rest of the group, just be very careful if you get slowed while they are chasing you.
When trying to go through a Tomb it is important pick your battles one at a time, as almost every status effect in the game can be inflicted towards you at one point or another. With many enemies in this dungeon, they will try a lure you into other enemies, they all know what their attack ranges are and will stay that distance from you. If you want to keep from being overwhelmed you should get one, just one monsters attention at a time and lure it out into a safer room, they will follow you, just at a respectful distance. Avoid all towers if possible, and don’t stop traps until the entire room is cleared. Try and explore the dungeon a little to, clearing out every room can’t hurt you, and finding a treasure room is really nice.
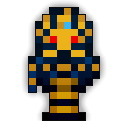
In every Tomb you must kill 1-5 of these in order to fight Bes, Nut, and Geb. They often drop tinctures when they are destroyed, great for buffing during the boss fights. If you have only one Sarcophagus in a Tomb then that means there are 4 Golden Treasure Rooms to be found.
15,000 HP
100 Defense
Does no damage to anyone, ever.
The most common way to destroy a Sarcophagus is to kill its many holy groupies. If you just jump in and start shooting the Sarcophagus then they will just heal it right back up again. There are 2 types of healers surrounding the sarcophagus, the boys are much smaller, much less details, and much stronger, the girls are much weaker, much bigger, and usually weaken you often. Try to pick a target and chase it until you kill it, then move on to another.
The other way is to accumulate multiple (usually melee) players like pally, warrior and knight in order to rush the sarc and destroy it instantly, giving the priests no time to heal. A mystic is also preferred for her stasis ability to safely remove any priests from the battle.
There can be 0-4 treasure rooms in a Tomb. These treasure rooms are the best Treasure rooms in the game, as the boss does not attack at all, yet can drop so much loot. There are usually no minions in this room, and in the center of the room is a giant, sand colored Sarcophagus. Like i said it does not attack, and it has 50000 HP and 100 Defense. They can drop any stat pot (excluding Life and Mana) and they also drop para rings and T9-10 weapons and armors. They also spawn Canopic Jars while you are fighting him, which can drop HP and MP potions when destroyed, although sometimes they spawn scarabs instead, just to keep you on your toes. This is a great way to prepare for the boss battles, and a reason to enter a Tomb when you aren’t ready to do so.
First of all it is very important that if you are not alone in this dungeon, that you make sure to communicate with the other people in there with you, and that you work together. When you are about to fight the bosses, make sure that you ask which boss everyone is going to shoot first, make sure everyone reaches a consensus, or else the boss battle can get a whole lot worse. When the third Sarcophagus is destroyed the bosses will no longer be statues, they will now be circling in the center of the room, much like constructs do. None of these bosses will attack until they get hit, but as soon as you hit one, make sure that it is the only boss to get hit until it is dead. Reasons why you want everyone to agree on one single boss at a time, say for example everyone is trying to take out Bes, he is big and scary and you have gotten so much damage that he has gotten to his much more dangerous rage phase, then someone shoots Nut, Bes will now be healed 300 hp per second and he will still be in his rage phase, almost ruining any chance of getting him out of the way, now you have no choice but to kill nut first, and when you injure Nut she will call on Geb to protect her, causing you to fight all 3 at once. Do you see the problem with that, you would be fighting 3 event level bosses in a small space and you could only kill one of them. Don’t be to hard on someone if they shoot one of the wrong bosses though, you never know if lag caused them to do it or not, and if you are busy being angry then you will lose focus and probably get killed. Because the bosses are constantly circling you will have to limit the amount of shots you take. If your a melee class, try to get 5 hits in then back up and wait for them to come around again, if you are a range class get maybe 8 hits in then stop shooting to avoid shooting a second boss. Trackpads and auto fire will get you killed.
Please realize that until there is but 1 boss left do not use: Spells, Traps, or Scepters. Also be very careful with your quiver shots, necro heals, shrunken throws and your poison bombs.
THE GENERALLY AGREED UPON BOSS FIGHTING STRATEGY IS Bes/Nut/Geb, that is you should probably fight Bes first, then Nut, then Geb.

Nut is the one with the white robe and blue phase, an easy way to remember her is that Nut=Nuts=Crazy
-Supporter/Healer.?80,000 HP?15 def
Heals Geb and Bes 100 HP per heal.
Dark Gray Spinner: No DMG, Weak for 10 seconds?Black Arrow: 40 DMG, Armor Break for 3 seconds?Green Quiver Arrow: 200 DMG, Paralyze for 1.4 seconds?Blue Bullets: 50 DMG, Paralyze for 1 second?Grey Boomerang: 40 DMG, Quiet for 1 second?Blue Boomerang: 40 DMG, Weak for 5 seconds?Green Boomerang: 40 DMG, Slow for 5 seconds?Purple Boomerang: 40 DMG, Blind for 5 seconds?Charge Stage: (Added skills only during charge stage [10% HP])?Black Magic: 180 DMG. Long Range.
Sphinx Artifact: Shoots 2 types of green stars:?A. 80 DMG, Slow for 3 seconds.?B. 120 DMG, Slow for 5 seconds, bigger size.
The main reason to aim for Nut first is if you are playing with people who are inexperienced , or if your team has not reached a clear consensus, as they might end up shooting all 3 bosses, but Nut will be the only one who is not healed, as she can only heal the other 2. She is also the least deadly before her Rage phase.
If you aim for Nut first you will have no choice but to fight Geb at the same time, as when she is attacking you she will occasionally call Geb over to attack you and block your bullets. Also when she gets into her Rage phase she will induce every status effect in the game which can be really bad if you have Geb or Bes sooting at you to. Also if someone has already started on a different boss, it is just mean of you to shoot at Nut and make them work for nothing.
During Nuts Rage phase she will shot out more status effect then ever before, even faster then before, this can be extremely dangerous, the only way to destroy nut during her rage phase is patents, limit your self to 2 seconds og contact, only have her on your screen for a maximum of 2 seconds at any given moment before you back up and regain. When she is almost dead you should lure her to a corner, because if you don’t get her away from the others when she dies, then you might not be able to pick up your loot and live.
An easy way to take out nut is to drag her to a corridor, then stand there and snipe her. It’s unlikely that she will get through.

Bes is the BIG scary sand golem, if you want to remember his name, Bes, because he is the color of a BEe Hive, or that he as big as BESsey the Cow.
-Defender.?100,000 HP?50 def
Dark Gray Spinner: No DMG, Weak for 10 seconds?Silver Shield: 2 types, one does 160 DMG the other does 60 DMG, both Stun for 1.2 seconds.?Red Boomerang: 150 DMG, Armor Break for 5 seconds?Black Magic: 240 DMG. Long Range.
Pyramid Artifact: Very fast Tri-shot. 40 DMG, Weak for 2 seconds.
This guy is the most intimidating, there fore it is really nice to get him out of the way early. He does not only do things such as armor break and massive damage, but he will also chase players all the way to the wall, meaning you can lure him into a trap, dealing massive damage to him without risk of shooting the other bosses, or getting hurt to much.
Also, Bes drops the best loot considered in the Tomb (prot and pyra) so most people go for him first, in case they may have to nexus sometime later.
If someone hits Nut while you are fighting him you will be so infuriated that you will lose focus and die, though this is the least dangerous boss of the 3, but his Rage phase is just straight up psychotic. Many of the reasons to aim for him first are reasons not to aim for him first. Sitting on top of Bes while concentrating on Nut is a bad idea. Say goodbye to your 8/8 knight!
This is probably the most manageable rage phase, while he is in his rage phase he will charge any players that come to close, he will not stop chasing them until the player makes it to the wall. With an accomplished knight he can easily stun Bes and therefore get an easy kill. Wizards and archers likewise can use their abilities to snipe him from the walls.
When Bes is close to its death make sure to get out of the way unless you have a knight to stun it. Bes will throw out around 20 of its armor piercing boomerang doubled up on one another, if you are not careful this will kill you.
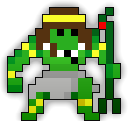
Geb is the Green archer that likes to snipe, his name is easy to remember because Geb=Green Guy.
-Attacker.?90,000 HP?30 def
Dark Gray Spinner: No DMG, Weak for 10 seconds?Green Boomerang: 100 DMG, Slow for 5 seconds?Fire Magic: 30 DMG, Armor Pierce?Black Small Magic: 200 DMG. Long Range.?Black Magic: 280 DMG. Long Range.?Weak Nuke: 30 Damage with an insane AOE like 8-10.?Grenade: 70 DMG. With same AOE as traps.?Grenade: 160 DMG. Same AOE as medusa’s.?Fireball: 80 DMG, These surrounding him when he’s at 50% HP, these also multi-hit.
Scarabs at range of 4-8. 3 of them, 5 when 20% hp.?Nile Artifact: 180 DMG, Triangle Shot, summons when nearing death.
He really isn’t intimidating or strategic, he has no advantages or disadvantages to shooting first compared to the others he is really just there. He is a good one to go after first if you want to laugh at Nut for calling out to him to protect her when he is dead. Great if you plan on going Geb\Nut\Bes.
The reason not to aim for this one first is that he is the least common one people shoot at, unless everyone agrees on it, don’t try it. He is actually a good sniper so it can be irritating to have him fighting. Geb’s rage phase (below) is extremely dangerous if you are fighting Nut or Bes, because he darts around the room shooting high damage shots. Take care.
Geb is the only one of the 3 who will back up if you get to close to him, instead of chasing you like Nut and Bes due, he will back up and continue to snipe you, but every 8 seconds he will quickly charge at you, which will throw you off, make sure to stay on your toes.
A vast majority of my information on Tombs can be found on the Wiki, also just knowing how you are supposed to go through a Tomb does not mean you know how to do one, any guide on Tomb ever made will make it sound easier then it is, but actually fighting in Tomb is a whole new experience.
This is by far the hardest dungeon to clear.
To survive you must be very skilled both in accuracy and dodging.
Do not use auto-fire, track pads, or play during a storm.
Make sure you have at least a solid hour to play before entering a tomb as well, you never know how long it will be.
If you end up learning how to solo a Tomb more power to you, you will never be poor in realm ever again.
I apologize if my Tomb guide didn’t help you out at all, it isn’t exactly my favorite dungeon, but i’m afraid 5000 words isn’t enough to show you the depth of what it takes to go through a Tomb. I hope you have good luck anyways though.